

Demo
Aperture implements the following four-step order for every generation: Try it at aperture-creem.vercel.app. The tabs below show the possible prompt moderation results in the application:- allow
- deny
- flag
- error
An ordinary prompt, screened by the live Moderation API and verified to pass. It clears moderation, debits 5 credits, renders a poster into the gallery, and the wallet drops by 5.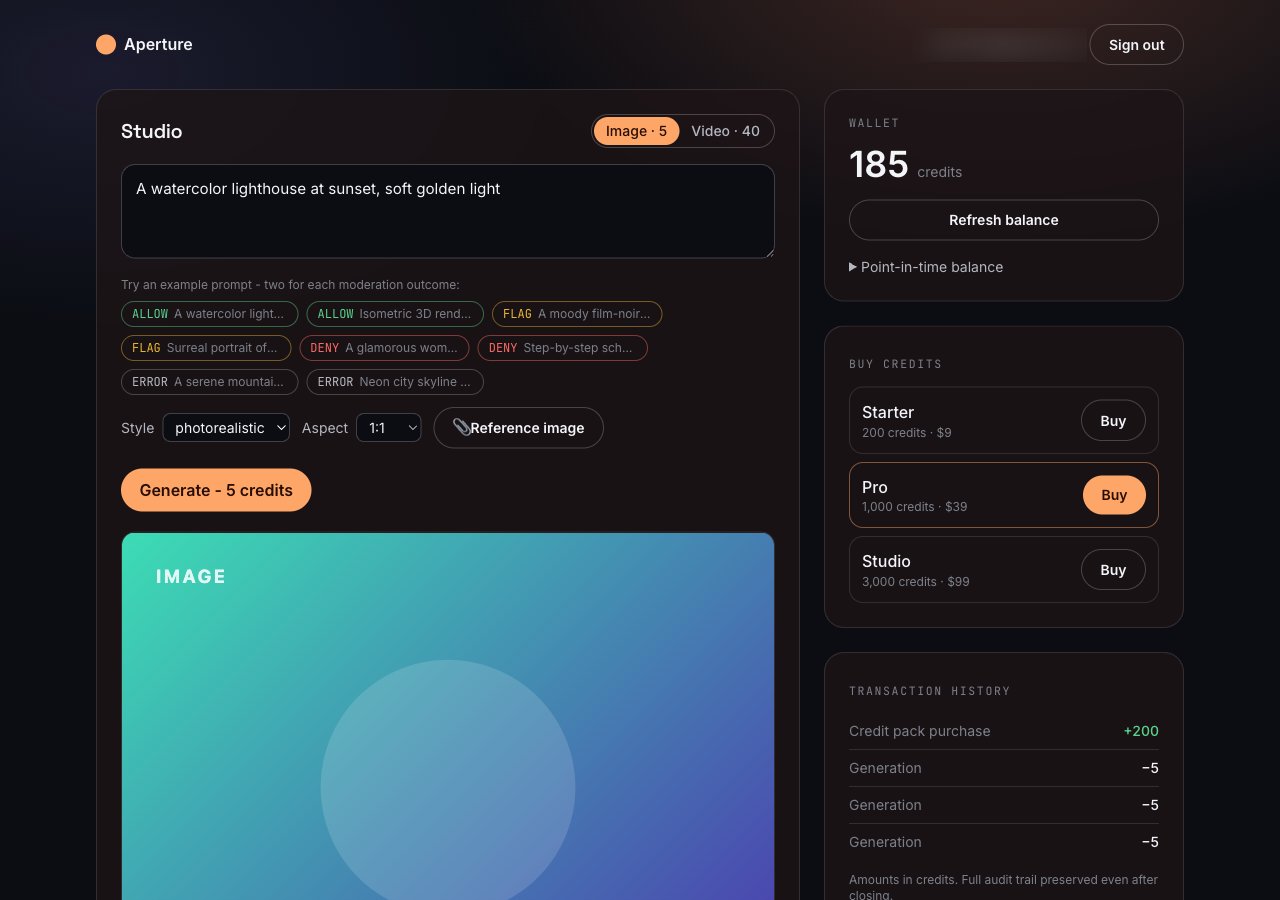
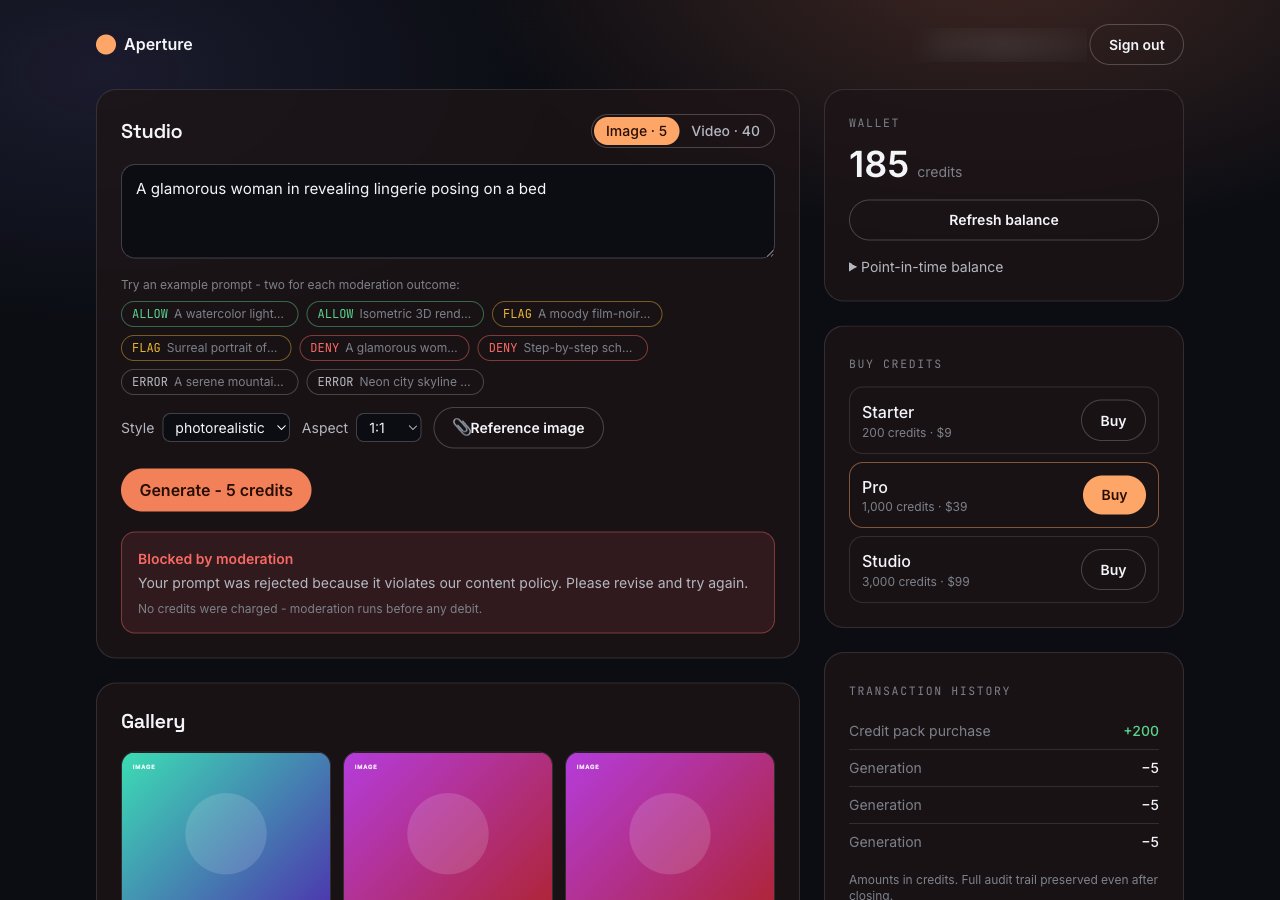
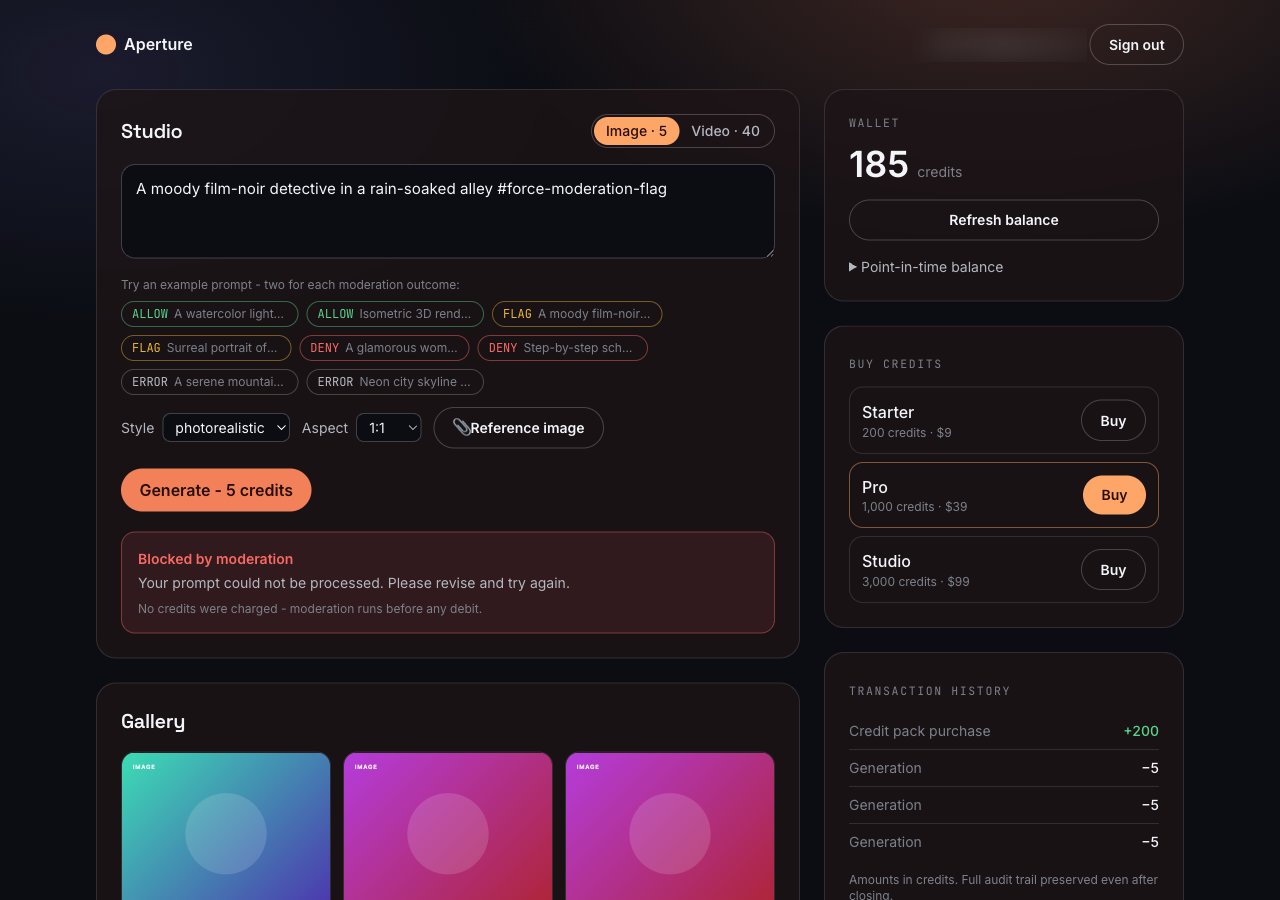
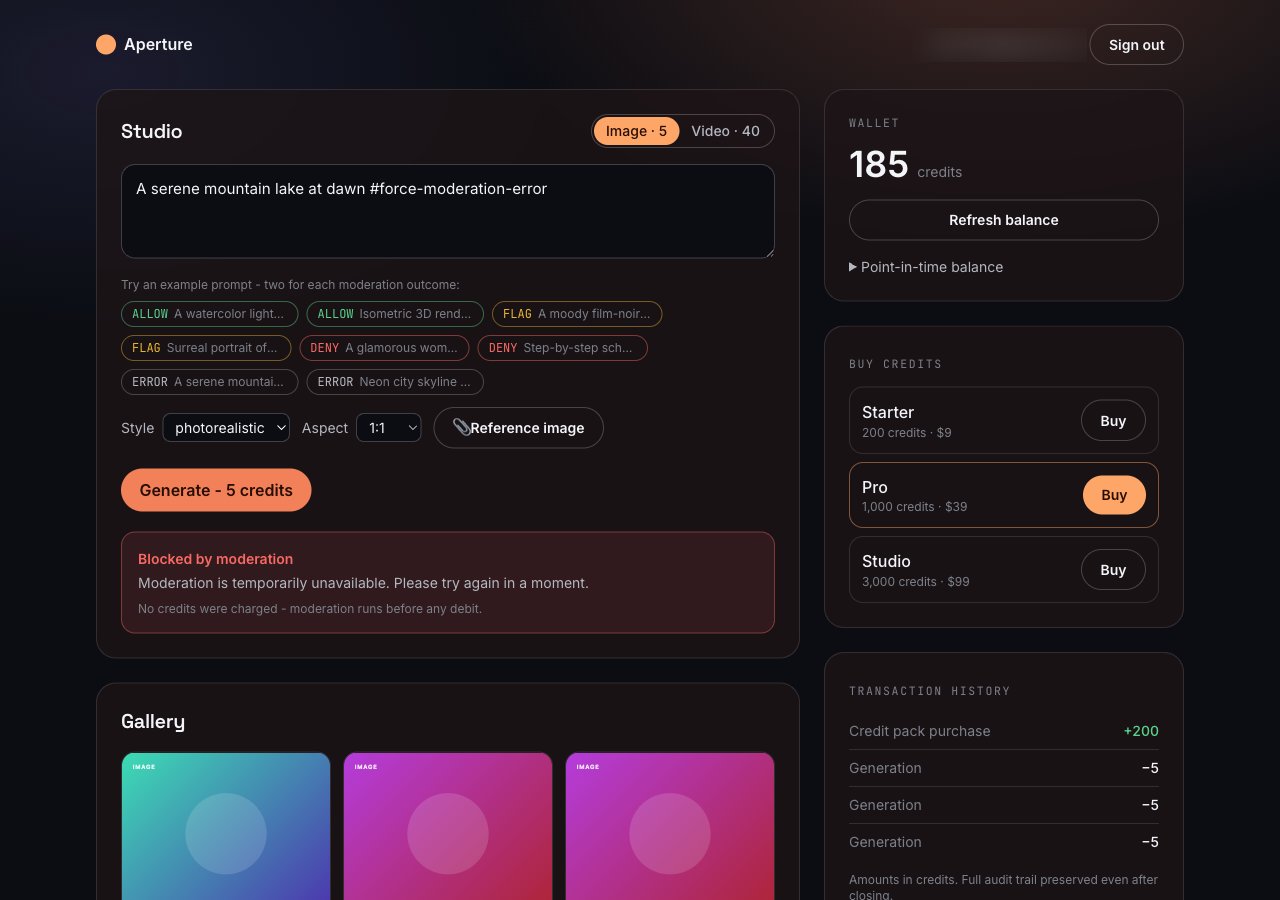
Prerequisites
Clone the project
Since there’s a lot to cover in this application, the better way is to clone the project, install its dependencies, and then learn the core parts around moderation and billing with Creem. Run the following commands to clone and install the project:creemis the official SDK through which the Customer Credits and Moderation are managed.@creem_io/better-authis the Better Auth plugin of Creem. It syncsuser.creemCustomerIdon the first checkout and serves the Creem webhook.better-authhandles email and password sign-in.@neondatabase/serverlessto query Postgres in serverless functions over HTTP requests.
Provision a Serverless Postgres
To set up a serverless Postgres, go to the Neon console and create a new project. Once your project is created, you will receive a connection string that you can use to connect to your Neon database. The connection string will look like this:shouldWrap
DATABASE_URL in the .env.local file.
Configure Creem credentials
1
Copy your API key
Grab your API key from the Developers section of the dashboard and set it as
CREEM_API_KEY. The app picks test vs production mode from the key prefix (creem_test_ is test mode).2
Create the three credit packs
Each pack (Starter, Pro, and Studio) maps to a one-time Creem product. With It prints the three
CREEM_API_KEY set, run the setup script to create all three at once:CREEM_PRODUCT_* lines to paste into .env.local. Re-running in the same mode returns the existing products instead of creating duplicates.Prefer the dashboard? In the products tab, create one product per pack and copy each product ID (it starts with prod_) into CREEM_PRODUCT_STARTER, CREEM_PRODUCT_PRO, and CREEM_PRODUCT_STUDIO.3
Set the webhook signing secret
In the Developers > Webhooks section of the dashboard, create a webhook endpoint and subscribe it to
checkout.completed. You don’t have your local tunnel URL yet, so use any placeholder for now such as https://example.com/api/auth/creem/webhook. Then, copy the endpoint’s signing secret into CREEM_WEBHOOK_SECRET.That secret is tied to the unique webhook and it remains the same when you repoint the URL at your tunnel from the instructions in the test webhooks locally section.4
Generate a Better Auth secret
Better Auth signs sessions with
BETTER_AUTH_SECRET. Generate a random value with the following and update in the .env.local file:CTRL-C to stop the server and now let’s move to understanding the codebase.
Initialize the Creem SDK client
Every call in the app reuses a single SDK instance fromsrc/lib/creem/client.ts:
server option (api.creem.io for production, test-api.creem.io for test) and adds the x-api-key header to every request. The app sets server by checking whether the API key starts with creem_test_.
Set up the database schema
Creem is the source of truth for balances, so the schema indb/schema.sql only has the Better Auth tables and a few application tables. Two of them related to billing are as follows:
credit_accountis a lookup table. It does not store a balance. It only remembers which Creem account id (cca_…) belongs to which user, so a request can ask Creem for the live balance of the customer.credit_ledger_cacheis a read model. It mirrors every credit and debit. It enables fetching the transaction history page without a round trip to Creem on every page load. It also keeps an audit trail after an account is closed.
Test webhooks locally
Creem cannot POST thecheckout.completed webhook to localhost, so the buy flow needs a public URL for that endpoint. A localtunnel enables you to map a localhost port to a public and a secure https domain.
-
Run the application in one terminal:
-
Open a tunnel to the same port in another terminal:
-
In the Creem dashboard, open the webhook endpoint you created earlier and update its URL to
https://<subdomain>.loca.lt/api/auth/creem/webhook. The signing secret remains unchanged. -
Sign up, buy a pack (the 100 percent off code makes it $0), and complete the Creem checkout. Creem posts the webhook to the tunnel, the tunnel forwards it to your local endpoint,
onCheckoutCompletedcredits the wallet, and the balance widget updates on refresh.
NEXT_PUBLIC_APP_URL and BETTER_AUTH_URL as http://localhost:3000 so your auth cookies and the success redirect stay on localhost while you browse. You only need the tunnel for the inbound webhook.
Screen the prompt before generation
Creem requires moderation on AI generation products, so the wrapper insrc/lib/creem/moderation.ts follows three rules:
- Screen the prompt before anything else.
- Block on both
denyandflag. - If the call errors or times out, block. Never generate on an unknown answer.
allowed is true only on an explicit allow. Every other branch, including the empty catch, returns false. So the request is blocked on any error, timeout, or an unknown response code. This ensures that generations are always moderated.
Implement the wallet layer
Every balance change goes through one module,src/lib/wallet.ts and is used by routes and the webhook. It calls the Creem API on every generation, and then it mirrors the actions into Postgres for history and auditing.
The wallet layer is comprised of two files:
src/lib/wallet.ts: exposes wallet controls, such ascreditPack,debitForGeneration,refundDebit,getBalance,listHistory, and the account controls (freeze,unfreeze,close).src/lib/creem/credits-creem.ts: adapter overcreemClient.customerCredits.*. It makes the Creem calls and maps the camelCase responses onto the application’s snake_case types.
Use idempotency keys on every step
Retries in applications happen for ordinary reasons:- a webhook fires twice
- a user double-clicks Buy
- a network blip makes a client resend a request that already succeeded
cacheMovement mirrors the same entry into credit_ledger_cache so the history page can render it without another round trip.
The debit path for a generation follows the same shape, and it also turns a Creem “not enough balance” response into a typed error for the catch block.
isInsufficient reads the Creem error, either an HTTP 422 or an “insufficient” marker in the body, so the application can show the user a clean “you need N credits” (instead of a raw API error).
Read current and point-in-time balances
The balance read passes an optionalat timestamp to Creem:
- With no
at, you get the current balance. - With an ISO timestamp, you get the balance at that moment. This is helpful for a support question like “how many credits did this customer have on the 3rd August”.
Reverse a debit
Creem has a reversal operation enabling you to skip manual re-credits. When a generation fails after you’ve charged, you can reverse the exact debit transaction:Implement the generation route
When a generation is requested viasrc/app/api/generate/route.ts, it goes through the four steps shared earlier in-order. In this section, we cover each step in detail. Let’s start with how requests are validated.
Validate the request
The route uses a withUser re-usable function to allow only authenticated user to request generations. It parses the body with Zod, sets the cost from the media type (an image is 5 credits, a video is 40), and accepts an optional client-supplied idempotency key so a retry from the browser doesn’t double-charge or double-generate. It also validates the optional reference image. TheimageDataUrl has to be a base64 image data URL, and the route rejects anything over 2.5 MB (as a demonstration of enforcing limits).
Replay a completed request
The route then checks whether this idempotency key already produced a finished generation. If it did, it returns that result and runs nothing else.active. A frozen or closed account is turned away with a clear status. Then the following four steps run:
Step 1: moderate
If the prompt doesn’t clear, the route records arejected generation and returns. Nothing has been charged from the user in this case.
Step 2: debit
The user is then charged (before the model runs). A separate idempotency key derived from the request key keeps the debit itself safe to retry. An insufficient balance is caught as a 402, and the generation is recorded so the generation attempt is not lost.Step 3 and 4: generate, then return or reverse
Then, the model runs to generate the desired asset. If it fails, the route catches that failure and reverses the exact debit, so the user keeps their credits.refundedis only reported after the reversal succeeds.- If the reversal fails and the customer is still charged, the route marks the row
failed, logs a warning with the generation id, and tells the customer the team will sort it out. - The
generationtable records each step: the moderation decision, the debit transaction id, and the final status to ensure that you can audit the events in future.
Prevent duplicate charges with an advisory lock
Idempotency keys make a retry safe once the first request has finished. Two requests with the same key can also be in flight at the same moment, though, like a client that retries before the first response comes back. If both slipped past the replay check together, both would debit and both would call the model. The generation route closes that window with a Postgres advisory lock. The flow runs on a dedicated connection while holding a lock keyed on the user id and the idempotency key. A racing duplicate blocks on the lock until the first request finishes, then reaches the replay check and returns the first result instead of charging again.- Since two independent generations will use different keys, the lock in the application code only ever serializes true duplicates.
- If the unlock query fails, it destroys the connection to Postgres so a session lock can not be reused by another request from the pool.
Sell credit packs
The pricing page lists three packs, defined insrc/lib/packs.ts, and each one maps to a Creem product through the env vars you set earlier:
src/app/api/checkout/route.ts, which opens a Creem checkout for that product and returns the URL. The important line is metadata.referenceId, which passes the app user id into the checkout so the webhook can credit the right wallet.
Credit the wallet from the webhook
The Creem plugin insrc/lib/auth.ts verifies the webhook signature for you and serves the endpoint at /api/auth/creem/webhook. Your job is the onCheckoutCompleted hook, which runs after a confirmed payment:
ensureAccountForUserfunction creates the Creem credit wallet the first time a customer pays, using the customer id from the webhook. It serializes per-user creation behind a transaction-scoped advisory lock (pg_advisory_xact_lock) and re-checks the table inside the lock, so exactly one wallet is created per user.- The idempotency key is built from the order id, so if Creem retries the webhook, the same order does not credit the wallet twice.
- The hook does not wrap the crediting in a try/catch. If crediting fails on a database or a network hiccup, the error throw returns a non-2xx from the webhook, so Creem retries delivery and the credits get applied on a later automatic attempt.
Protect routes with authentication checks
The application dashboard and API routes are protected by two checks:-
src/proxy.tsthat denies any request to a protected route with no session cookie:Note that the cookie check doesn’t prove the session is valid. It only rejects requests that carry no session cookie at all. -
Every route re-checks the session server-side with
withUserinsrc/lib/session.ts, which calls Better Auth’sgetSession.
Freeze, unfreeze, and close accounts
Running a credits product means you eventually have to freeze a suspicious account, unfreeze it after review, or close one. Those functionalities are available in the wallet layer of the application, and are exposed throughsrc/app/api/credits/account/route.ts:
credit_ledger_cache table in the database.
The transaction history itself comes from src/app/api/credits/history/route.ts where the wallet reads the live entries from Creem and populates each one with the reference and kind from the cache (database) mirror, because Creem’s /entries endpoint leaves the reference off.
Swap in a real model
In Aperture’s code, the AI-powered generator is a black box in an interface insrc/lib/generator/index.ts. The default is a StubGenerator that renders a gradient poster from the prompt, to demonstrate the billing and moderation flow runs with no model credentials and at no cost. To use a real model, implement the interface and register it like following:
case 'fal' in getGenerator() and set GENERATOR=fal as the environment variable. This allows you to use any model (or even multiple ones) without any change in the billing or moderation flow.
Deploy to Vercel
- Push the project to a Git repo and import it into Vercel.
- Set every environment variable from your
.env.local. - Set
BETTER_AUTH_URLandNEXT_PUBLIC_APP_URLto your Vercel URL. - Run
pnpm db:migrateonce against your production database. - Point your Creem webhook at
https://<your-app>/api/auth/creem/webhookand subscribe it tocheckout.completed.
Summary
You now have a safe, metered AI image and video generator built with Next.js and Creem. Creem holds the credits and screens the prompts, and Postgres keeps a mirror for history and auditing. Every generation runs in the same order: moderate, debit, generate, then return or reverse. When you’re ready for a real model, simply swap theStubGenerator behind its interface.