> ## Documentation Index
> Fetch the complete documentation index at: https://docs.creem.io/llms.txt
> Use this file to discover all available pages before exploring further.
# Strapi
> Manage Creem products and checkout directly from your Strapi 5 admin panel.
## Overview
[Strapi](https://strapi.io/) is a leading open-source headless CMS for structuring content and building flexible APIs. The [`@creem_io/strapi`](https://www.npmjs.com/package/@creem_io/strapi) plugin brings Creem's billing capabilities directly into your Strapi 5 admin panel, so you can create products, configure checkout, and receive verified webhooks without leaving your CMS.
Creem acts as the legal seller of record. VAT, GST, and sales tax across 190+ countries are calculated, collected, and remitted for you, making this pairing especially useful when your Strapi project is the operational hub for a product you sell globally.
How to install and configure the Creem plugin for Strapi 5, manage products from the Strapi admin, wire up a front-end checkout through Strapi's content API, and receive verified Creem webhook events.
* A [Creem account](https://creem.io/) with at least one API key
* A Strapi 5 project (or create one during this guide)
* Node.js v22 or later
## Create a Strapi project
Open your terminal and scaffold a new Strapi project with their CLI:
```bash theme={null}
npx create-strapi@latest my-strapi-app
```
When prompted, configure the CLI options (such as database setup) according to your preferences.
Once that is done, move into the project directory and start the app in development mode by executing the following command:
```bash theme={null}
cd my-strapi-app
npm run develop
```
The Strapi admin panel will be available at `http://localhost:1337/admin`. Complete the initial registration so you can sign in after installing the plugin.
## Install the Strapi plugin
To install the plugin, run the following command:
```bash theme={null}
npm i @creem_io/strapi
```
Then, restart Strapi instance after installation:
```bash theme={null}
npm run develop
```
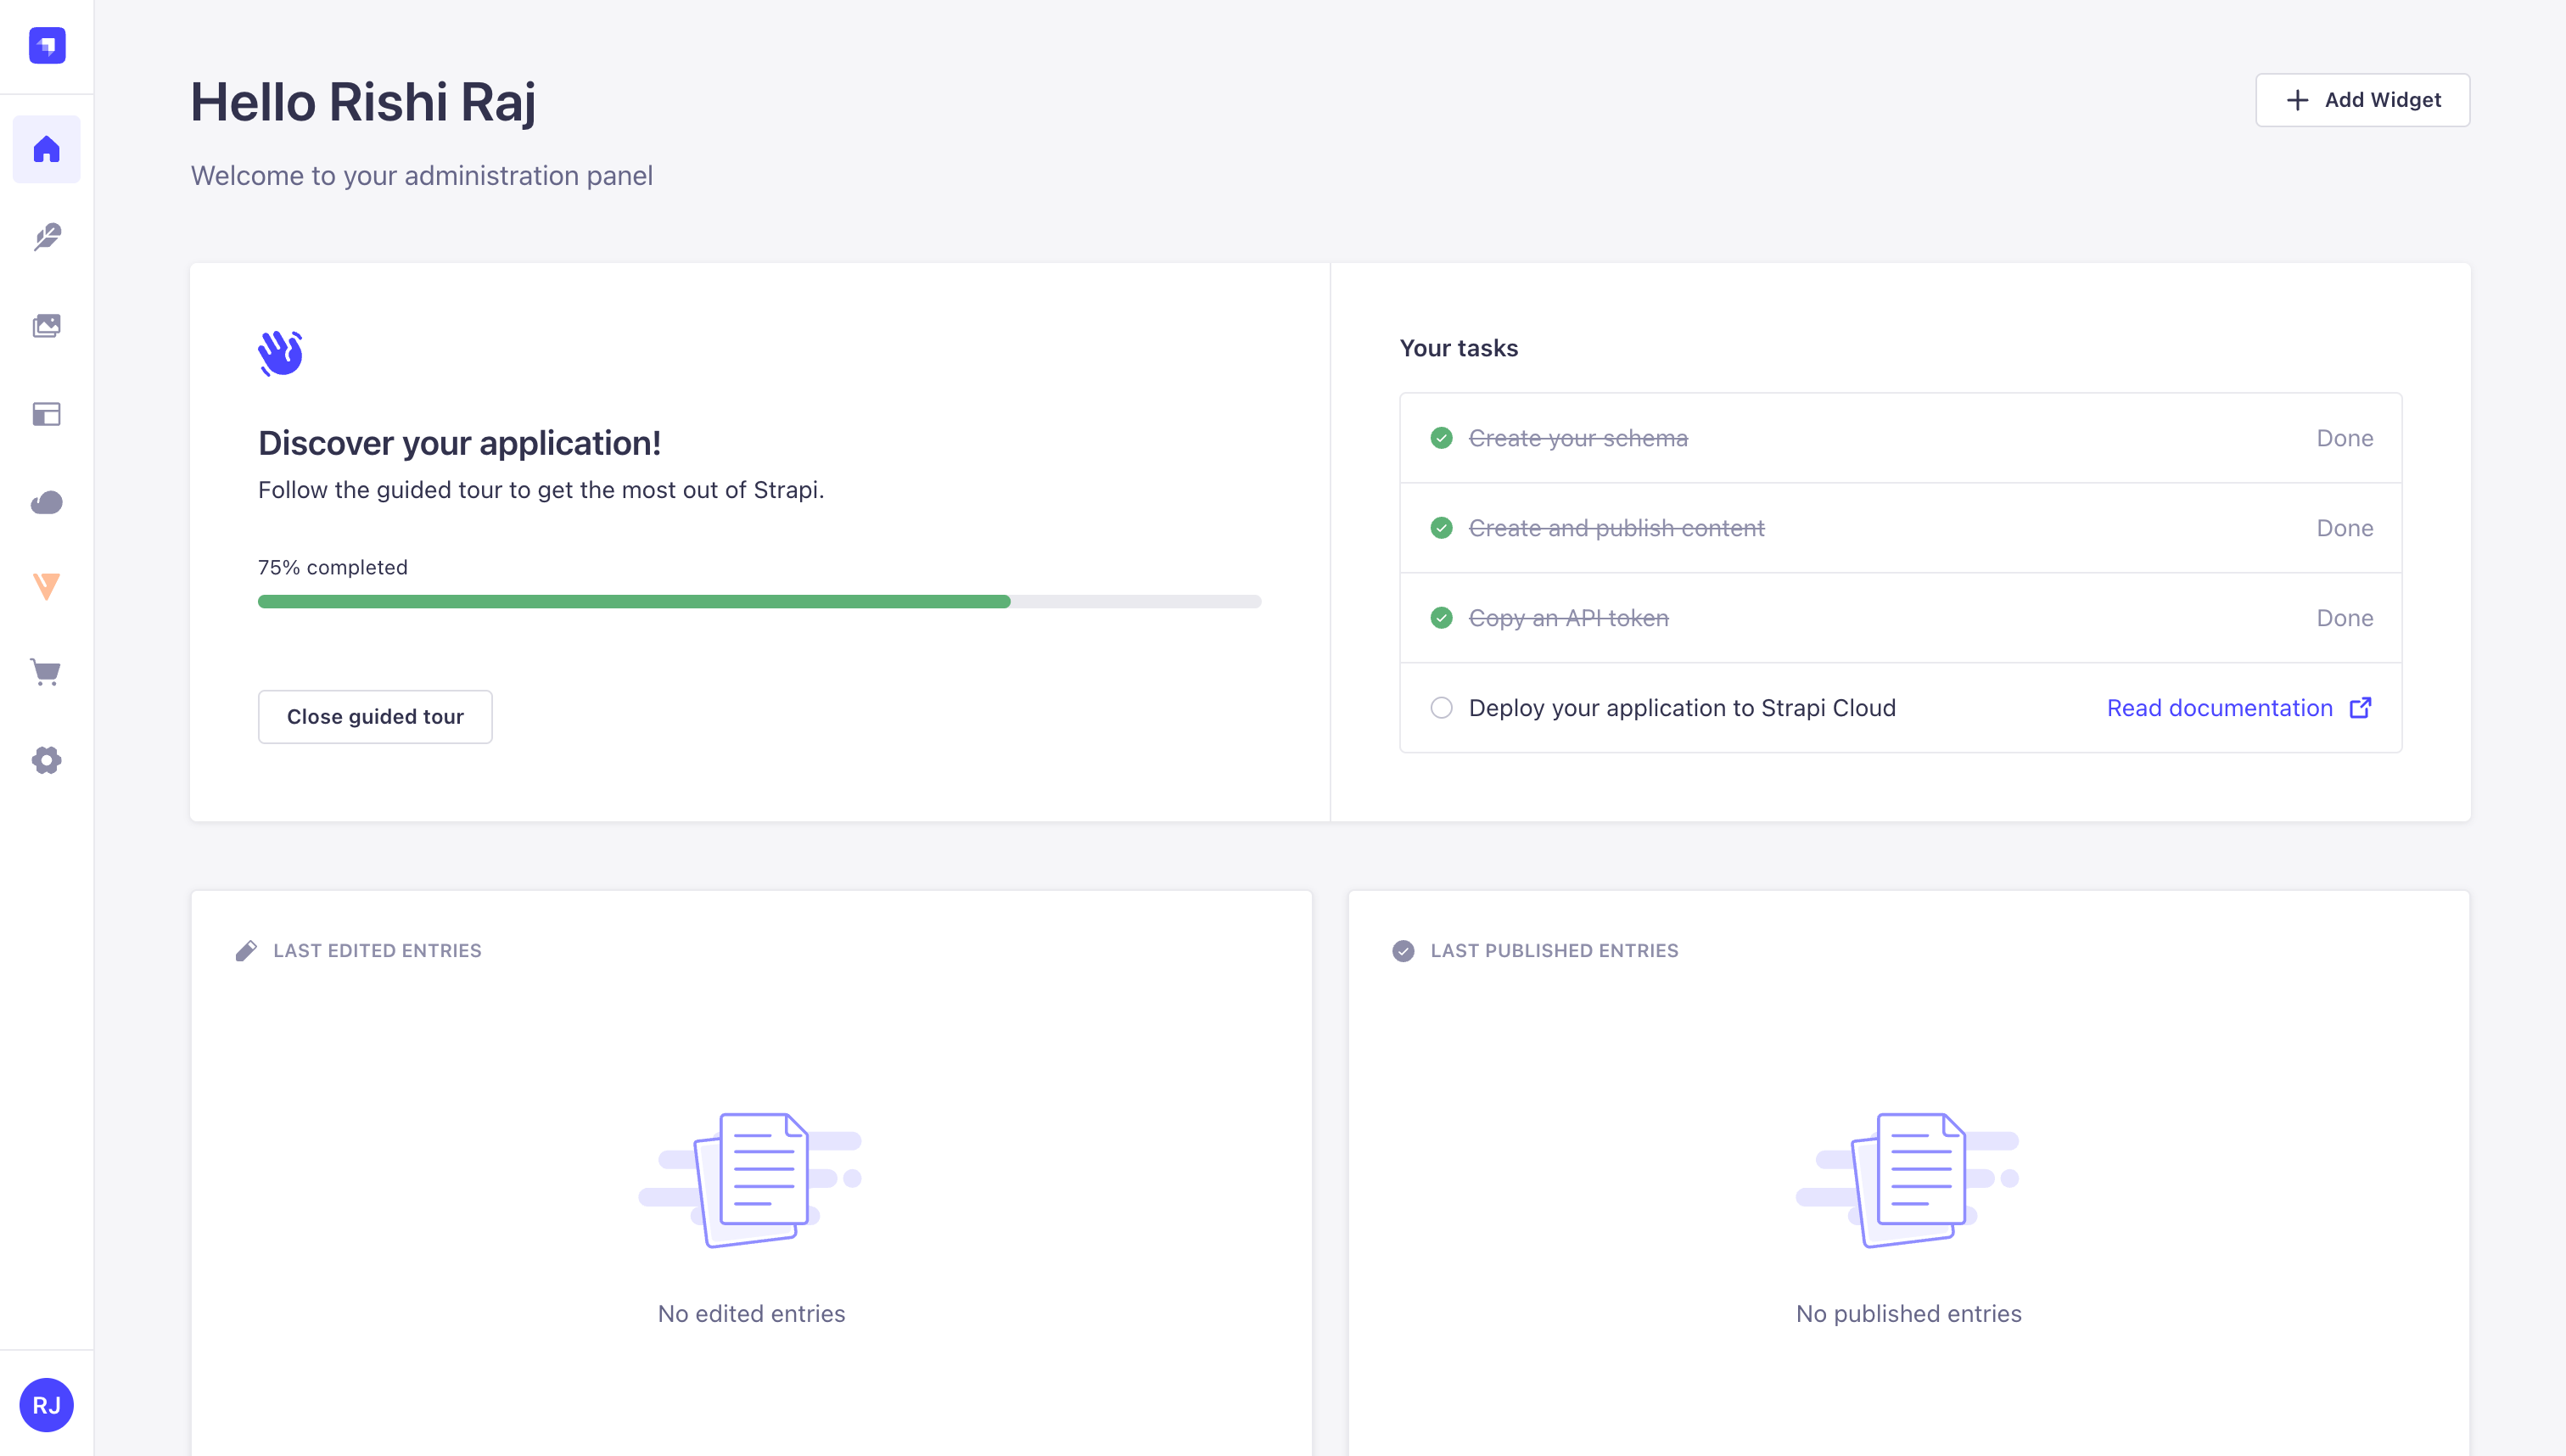
After restarting, you should see the Creem plugin appear in the left sidebar.
 ## Configure environment variables
### API Keys
Get at least one API key from the [Creem dashboard](https://creem.io/dashboard) under **Developers**. Test and production keys are separate; test keys are typically prefixed with `creem_test_`.
| Variable | When you need it |
| --------------------------- | ------------------------------------------ |
| `STRAPI_CREEM_TEST_API_KEY` | Test Mode (`https://test-api.creem.io/v1`) |
| `STRAPI_CREEM_API_KEY` | Production (`https://api.creem.io/v1`) |
### Webhook Secret (optional)
| Variable | Purpose |
| ----------------------------- | ---------------------------------------------------------------------------------------------- |
| `STRAPI_CREEM_WEBHOOK_SECRET` | Signing secret from **Developers → Webhook** so Strapi can verify the `creem-signature` header |
Once obtained, add these variables to your Strapi project's `.env`:
```bash theme={null}
# API Keys
STRAPI_CREEM_TEST_API_KEY="creem_test_..."
STRAPI_CREEM_API_KEY="creem_..."
# Webhook Secret
STRAPI_CREEM_WEBHOOK_SECRET="..."
```
Restart your Strapi project for changes to take effect:
```bash theme={null}
npm run develop
```
## Access the plugin
Open the admin panel again and then open **Strapi 5 Plugin for Creem** in the left sidebar.
## Configure environment variables
### API Keys
Get at least one API key from the [Creem dashboard](https://creem.io/dashboard) under **Developers**. Test and production keys are separate; test keys are typically prefixed with `creem_test_`.
| Variable | When you need it |
| --------------------------- | ------------------------------------------ |
| `STRAPI_CREEM_TEST_API_KEY` | Test Mode (`https://test-api.creem.io/v1`) |
| `STRAPI_CREEM_API_KEY` | Production (`https://api.creem.io/v1`) |
### Webhook Secret (optional)
| Variable | Purpose |
| ----------------------------- | ---------------------------------------------------------------------------------------------- |
| `STRAPI_CREEM_WEBHOOK_SECRET` | Signing secret from **Developers → Webhook** so Strapi can verify the `creem-signature` header |
Once obtained, add these variables to your Strapi project's `.env`:
```bash theme={null}
# API Keys
STRAPI_CREEM_TEST_API_KEY="creem_test_..."
STRAPI_CREEM_API_KEY="creem_..."
# Webhook Secret
STRAPI_CREEM_WEBHOOK_SECRET="..."
```
Restart your Strapi project for changes to take effect:
```bash theme={null}
npm run develop
```
## Access the plugin
Open the admin panel again and then open **Strapi 5 Plugin for Creem** in the left sidebar.
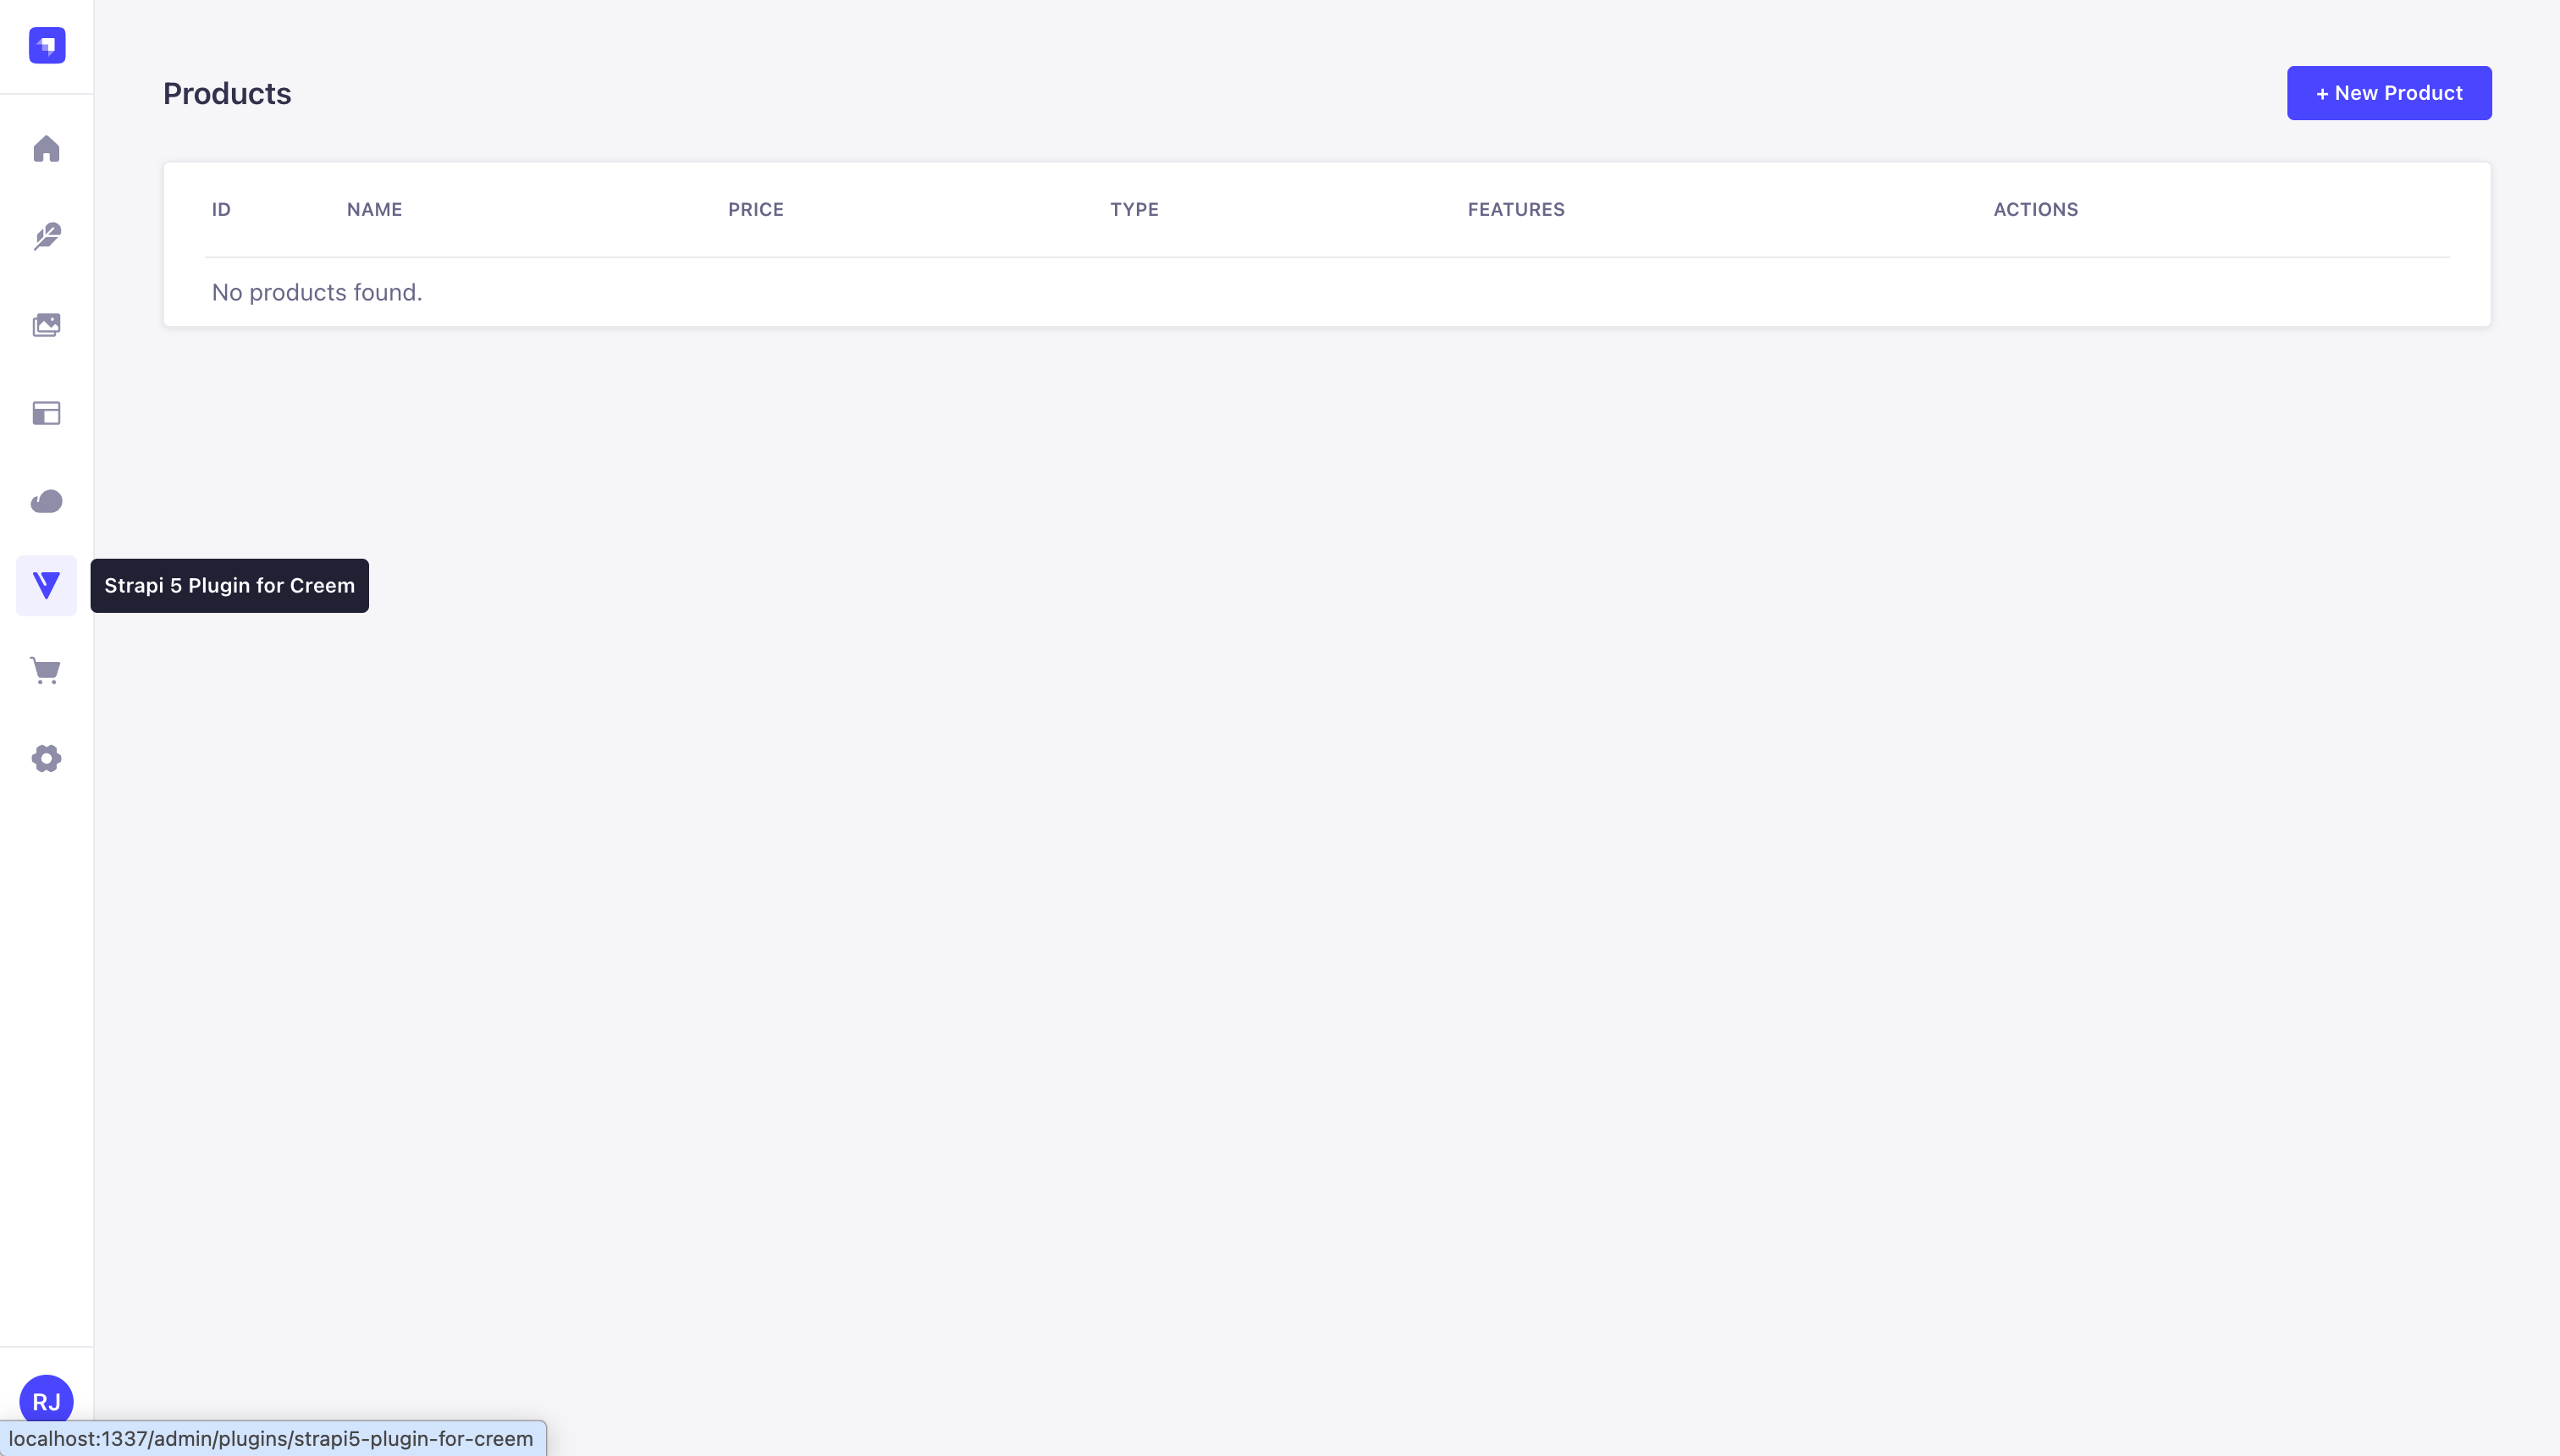 When you first open the Creem panel, it fetches and displays all products from [the Creem API](https://docs.creem.io/api-reference/endpoint/search-products). You can then manage these products directly within your Strapi instance.
## Manage products
Click **+ New Product** to open the create form.
When you first open the Creem panel, it fetches and displays all products from [the Creem API](https://docs.creem.io/api-reference/endpoint/search-products). You can then manage these products directly within your Strapi instance.
## Manage products
Click **+ New Product** to open the create form.
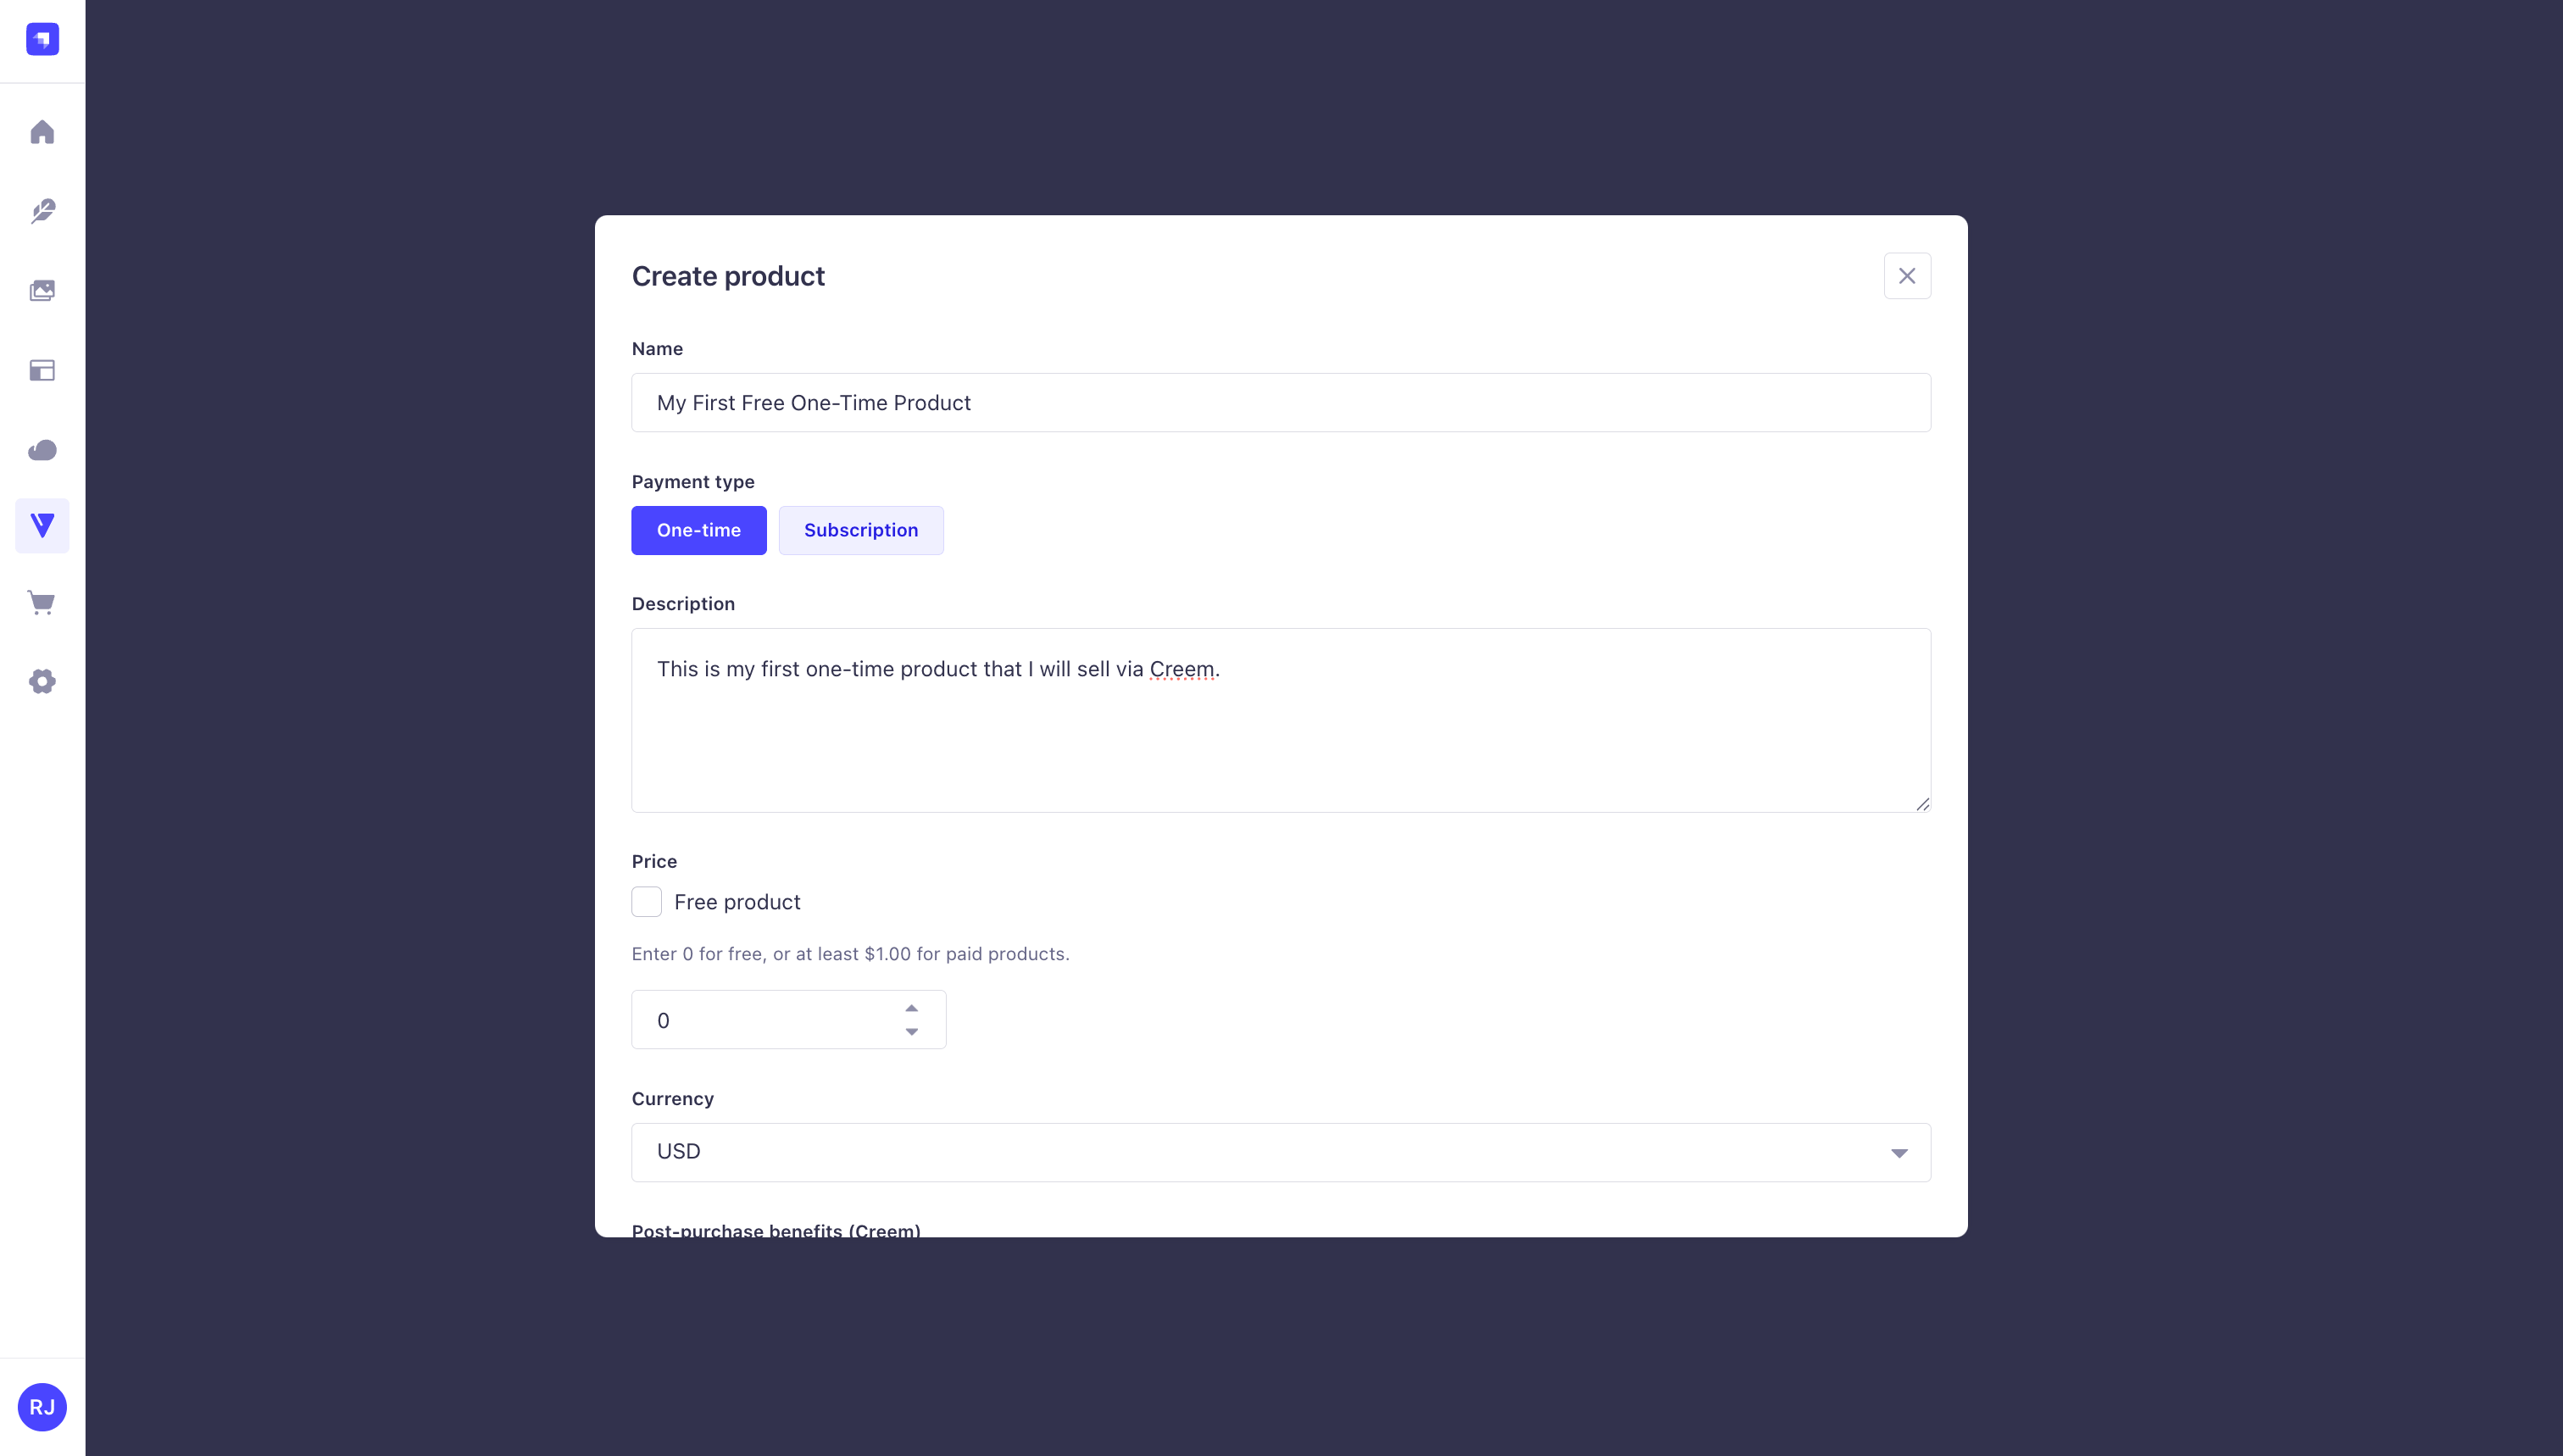 Supported options include:
* **One-time** and **subscription** products (including free products with price `0`)
* **Billing interval** for subscriptions (daily, monthly, every 3 months, every 6 months, yearly)
* **Currency** selection (USD or EUR)
* The list view excludes archived products
**Edit** and **archive** open the [Creem dashboard](https://www.creem.io/dashboard) directly. The Creem API does not support those operations through this plugin yet.
## Front-end checkout
The Strapi plugin exposes a checkout route through Strapi's [Content API](https://docs.strapi.io/cms/api/content-api).
```
POST /api/@creem_io/strapi/checkout
```
Supported options include:
* **One-time** and **subscription** products (including free products with price `0`)
* **Billing interval** for subscriptions (daily, monthly, every 3 months, every 6 months, yearly)
* **Currency** selection (USD or EUR)
* The list view excludes archived products
**Edit** and **archive** open the [Creem dashboard](https://www.creem.io/dashboard) directly. The Creem API does not support those operations through this plugin yet.
## Front-end checkout
The Strapi plugin exposes a checkout route through Strapi's [Content API](https://docs.strapi.io/cms/api/content-api).
```
POST /api/@creem_io/strapi/checkout
```
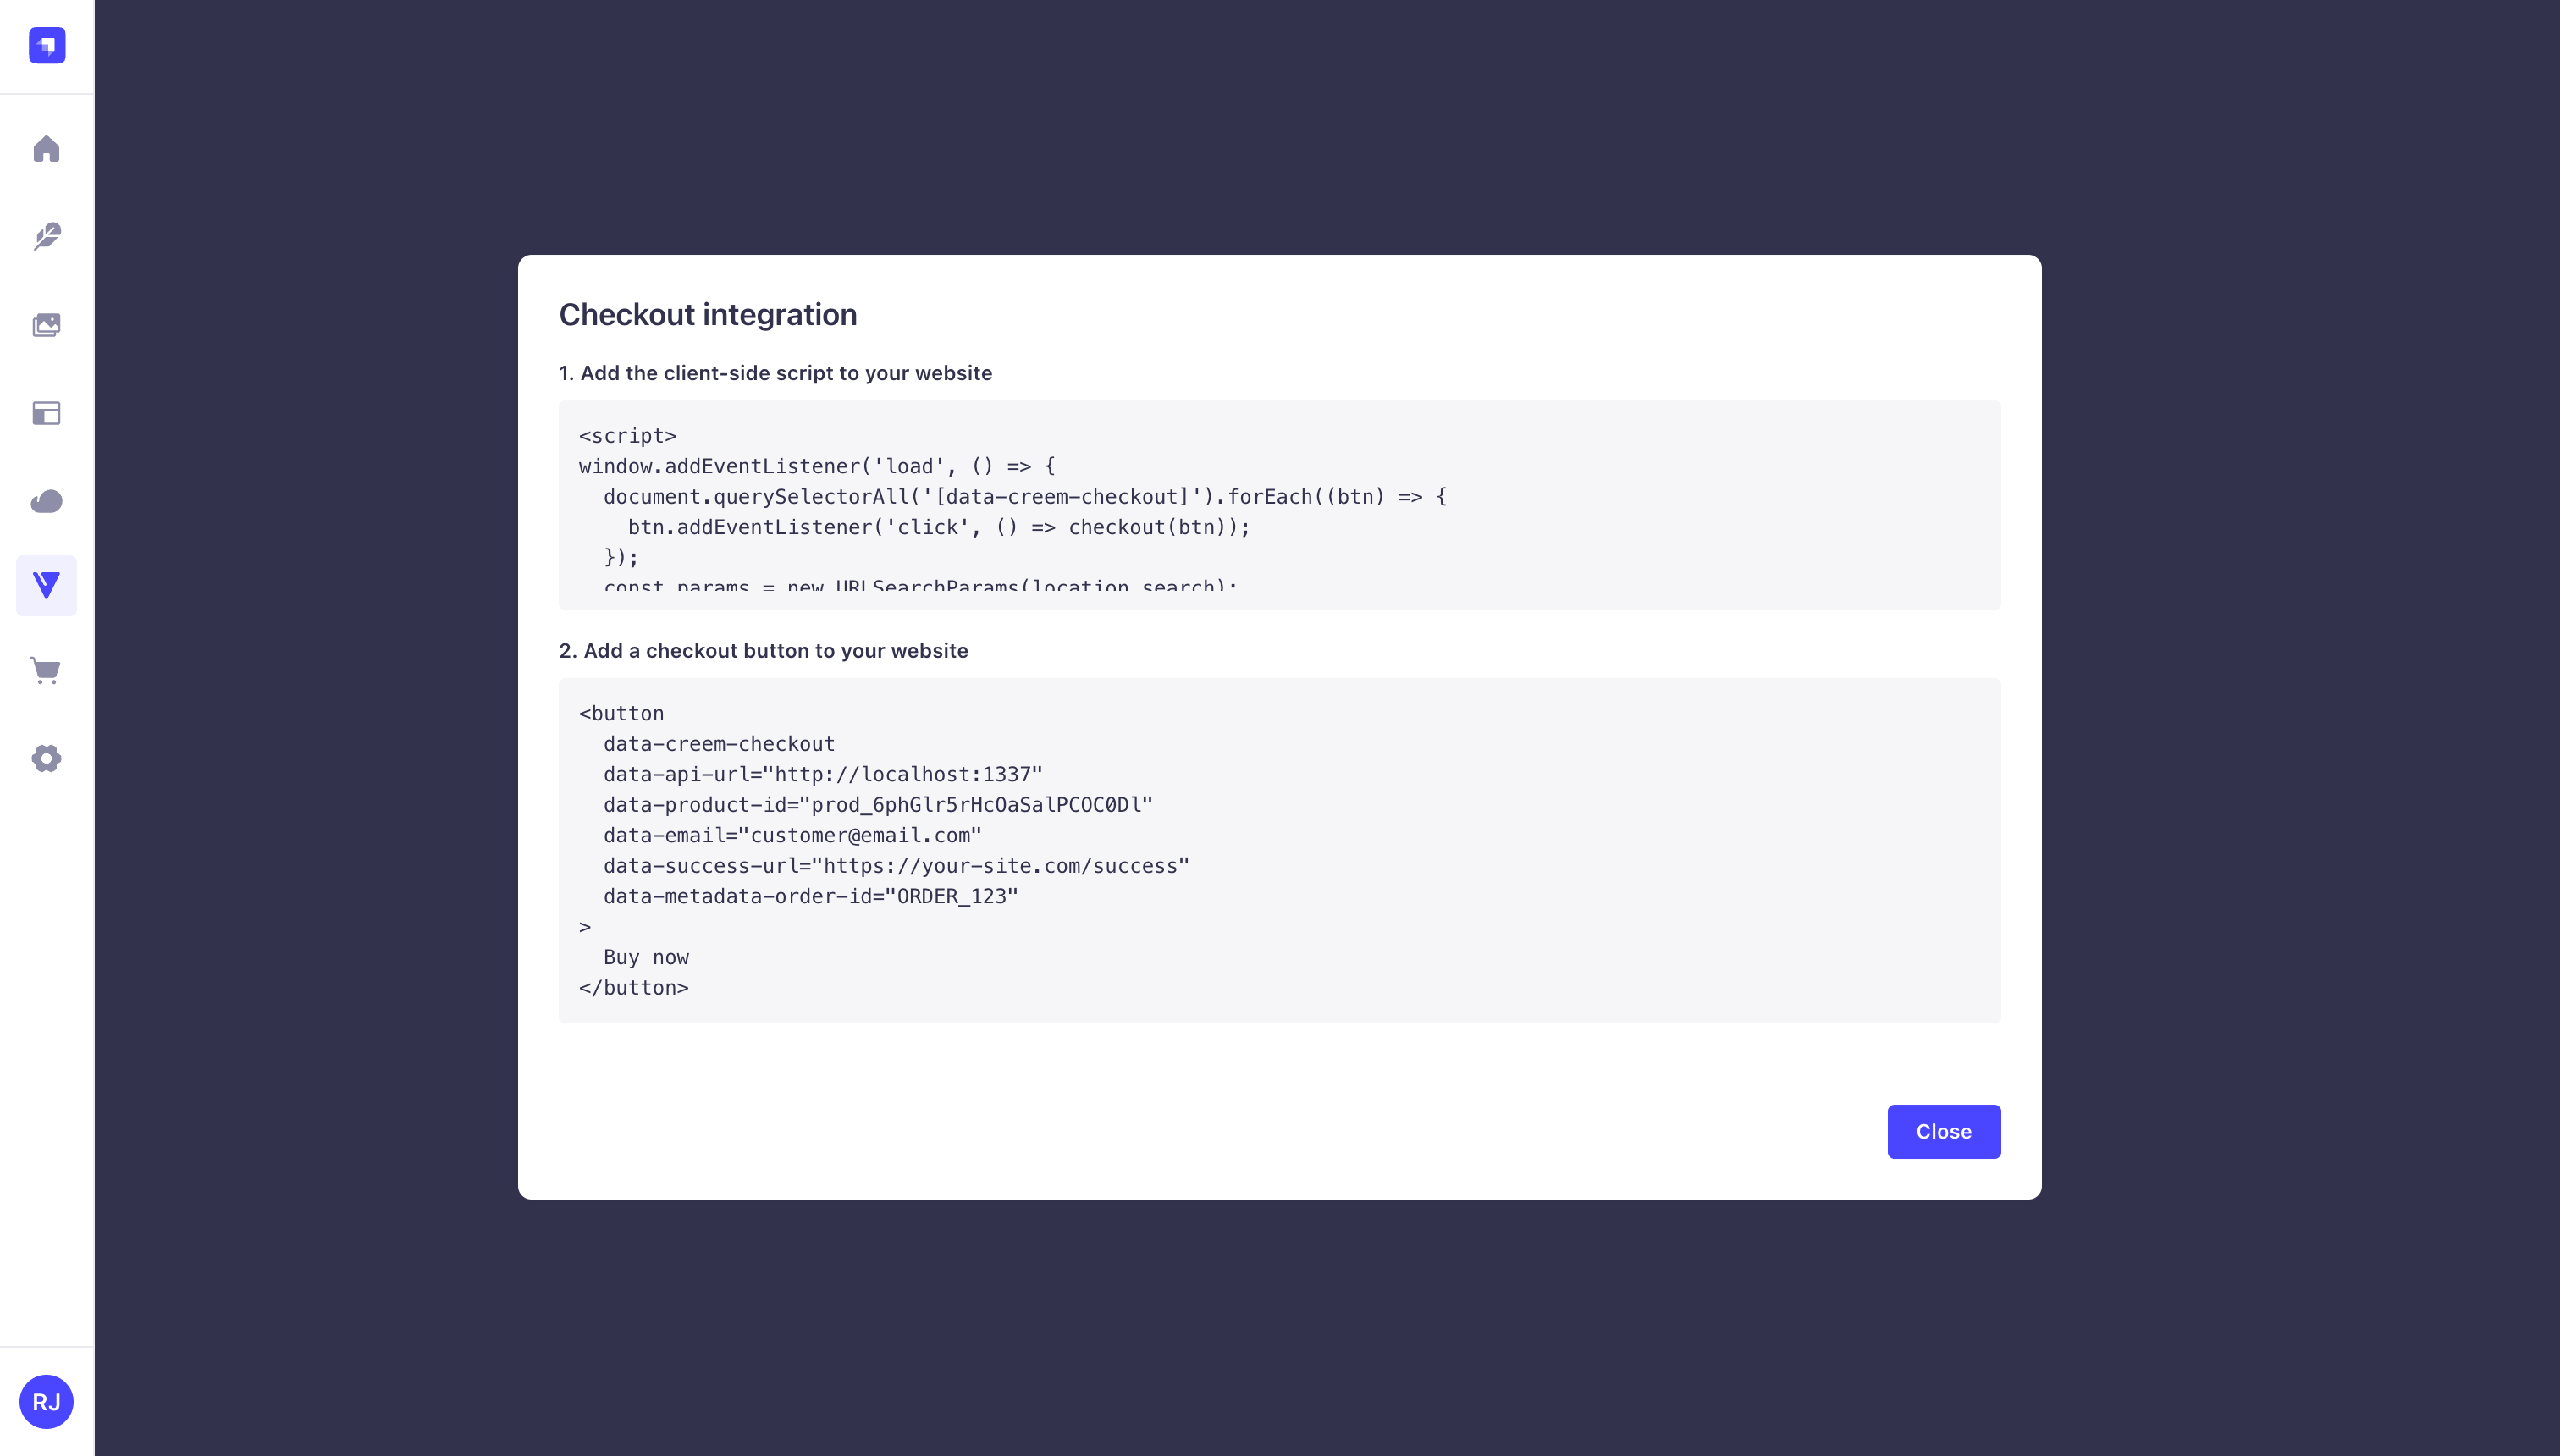 Your front end talks to **Strapi**, not directly to Creem, so API keys never reach the browser. The server creates a Creem checkout session and returns `{ "url": "..." }` for redirect.
**Example request body:**
```json theme={null}
{
"productId": "prod_abc123",
"customer_email": "customer@example.com",
"success_url": "https://your-site.com/success",
"metadata": {
"order_id": "ORDER_123"
}
}
```
The plugin also generates a ready-to-use **embed snippet** per product. Copy it from the product's embed dialog and drop it into your site with no extra dependencies.
## Configure environment and webhook forwarding
To configure the environment and webhook forwarding settings in Strapi, open the Strapi admin sidebar and click on **Settings**.
Your front end talks to **Strapi**, not directly to Creem, so API keys never reach the browser. The server creates a Creem checkout session and returns `{ "url": "..." }` for redirect.
**Example request body:**
```json theme={null}
{
"productId": "prod_abc123",
"customer_email": "customer@example.com",
"success_url": "https://your-site.com/success",
"metadata": {
"order_id": "ORDER_123"
}
}
```
The plugin also generates a ready-to-use **embed snippet** per product. Copy it from the product's embed dialog and drop it into your site with no extra dependencies.
## Configure environment and webhook forwarding
To configure the environment and webhook forwarding settings in Strapi, open the Strapi admin sidebar and click on **Settings**.
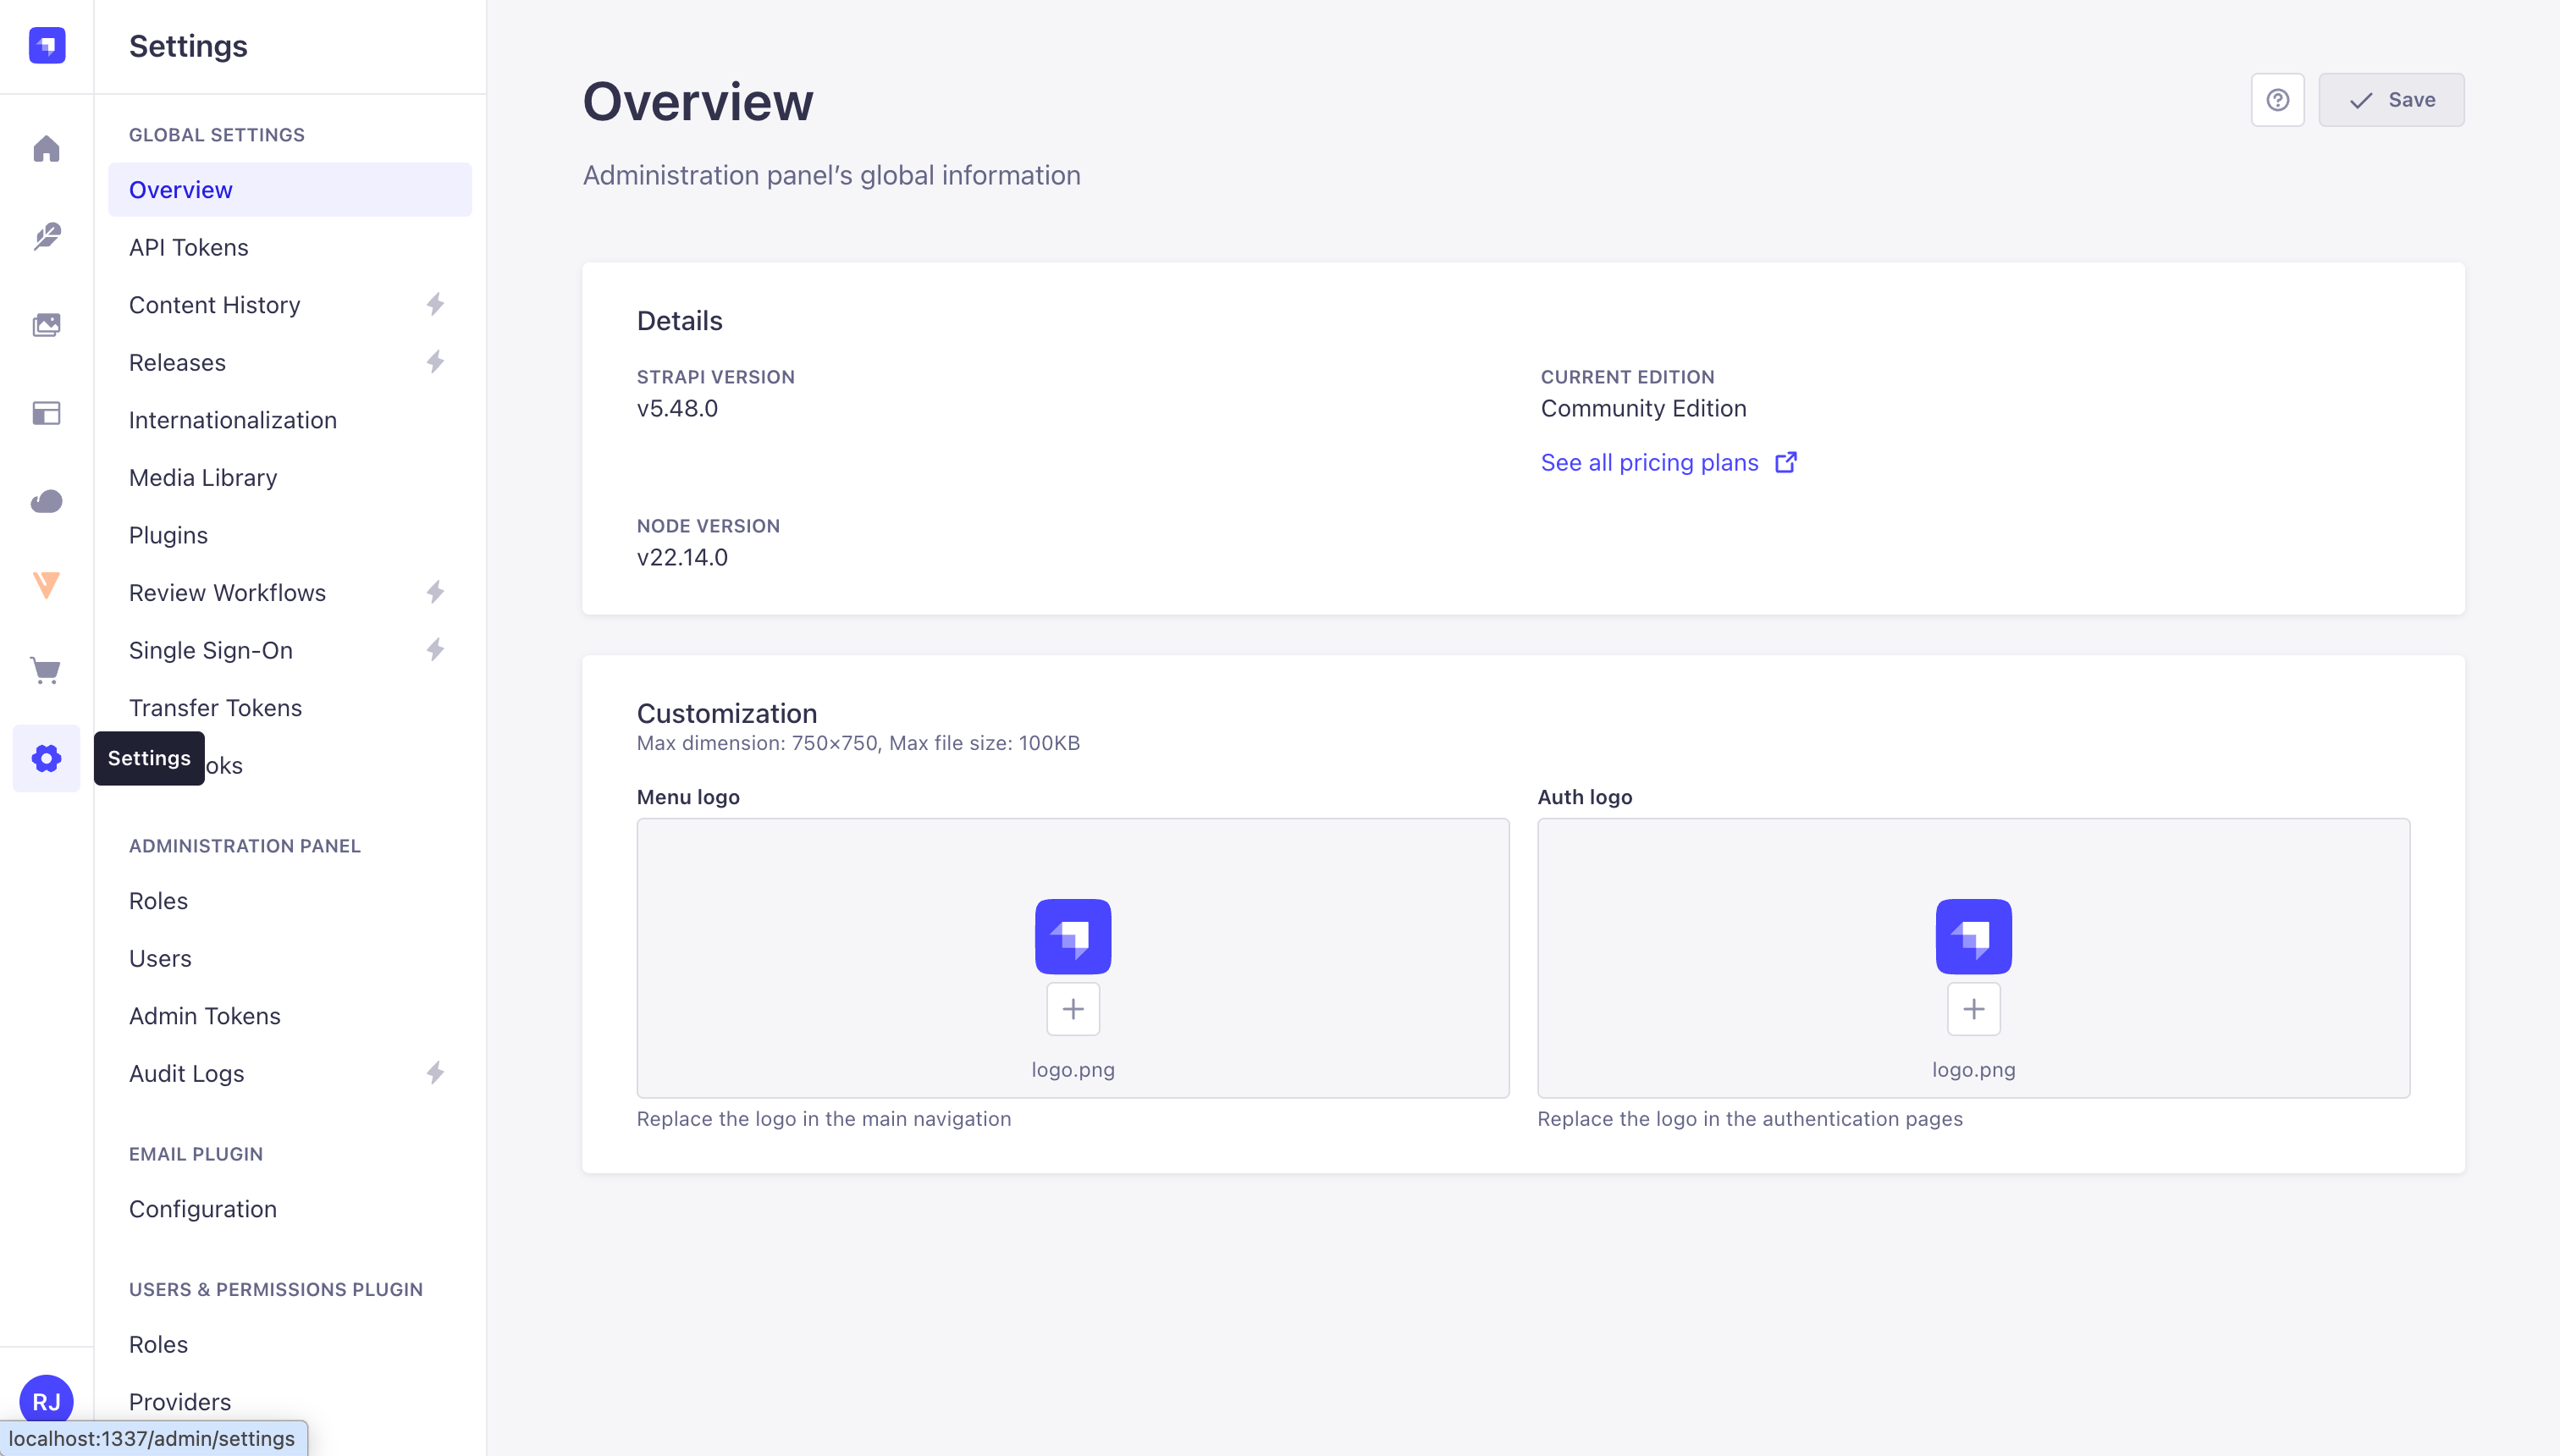 Click on **Configuration** within the Creem section to open the configuration panel for the plugin.
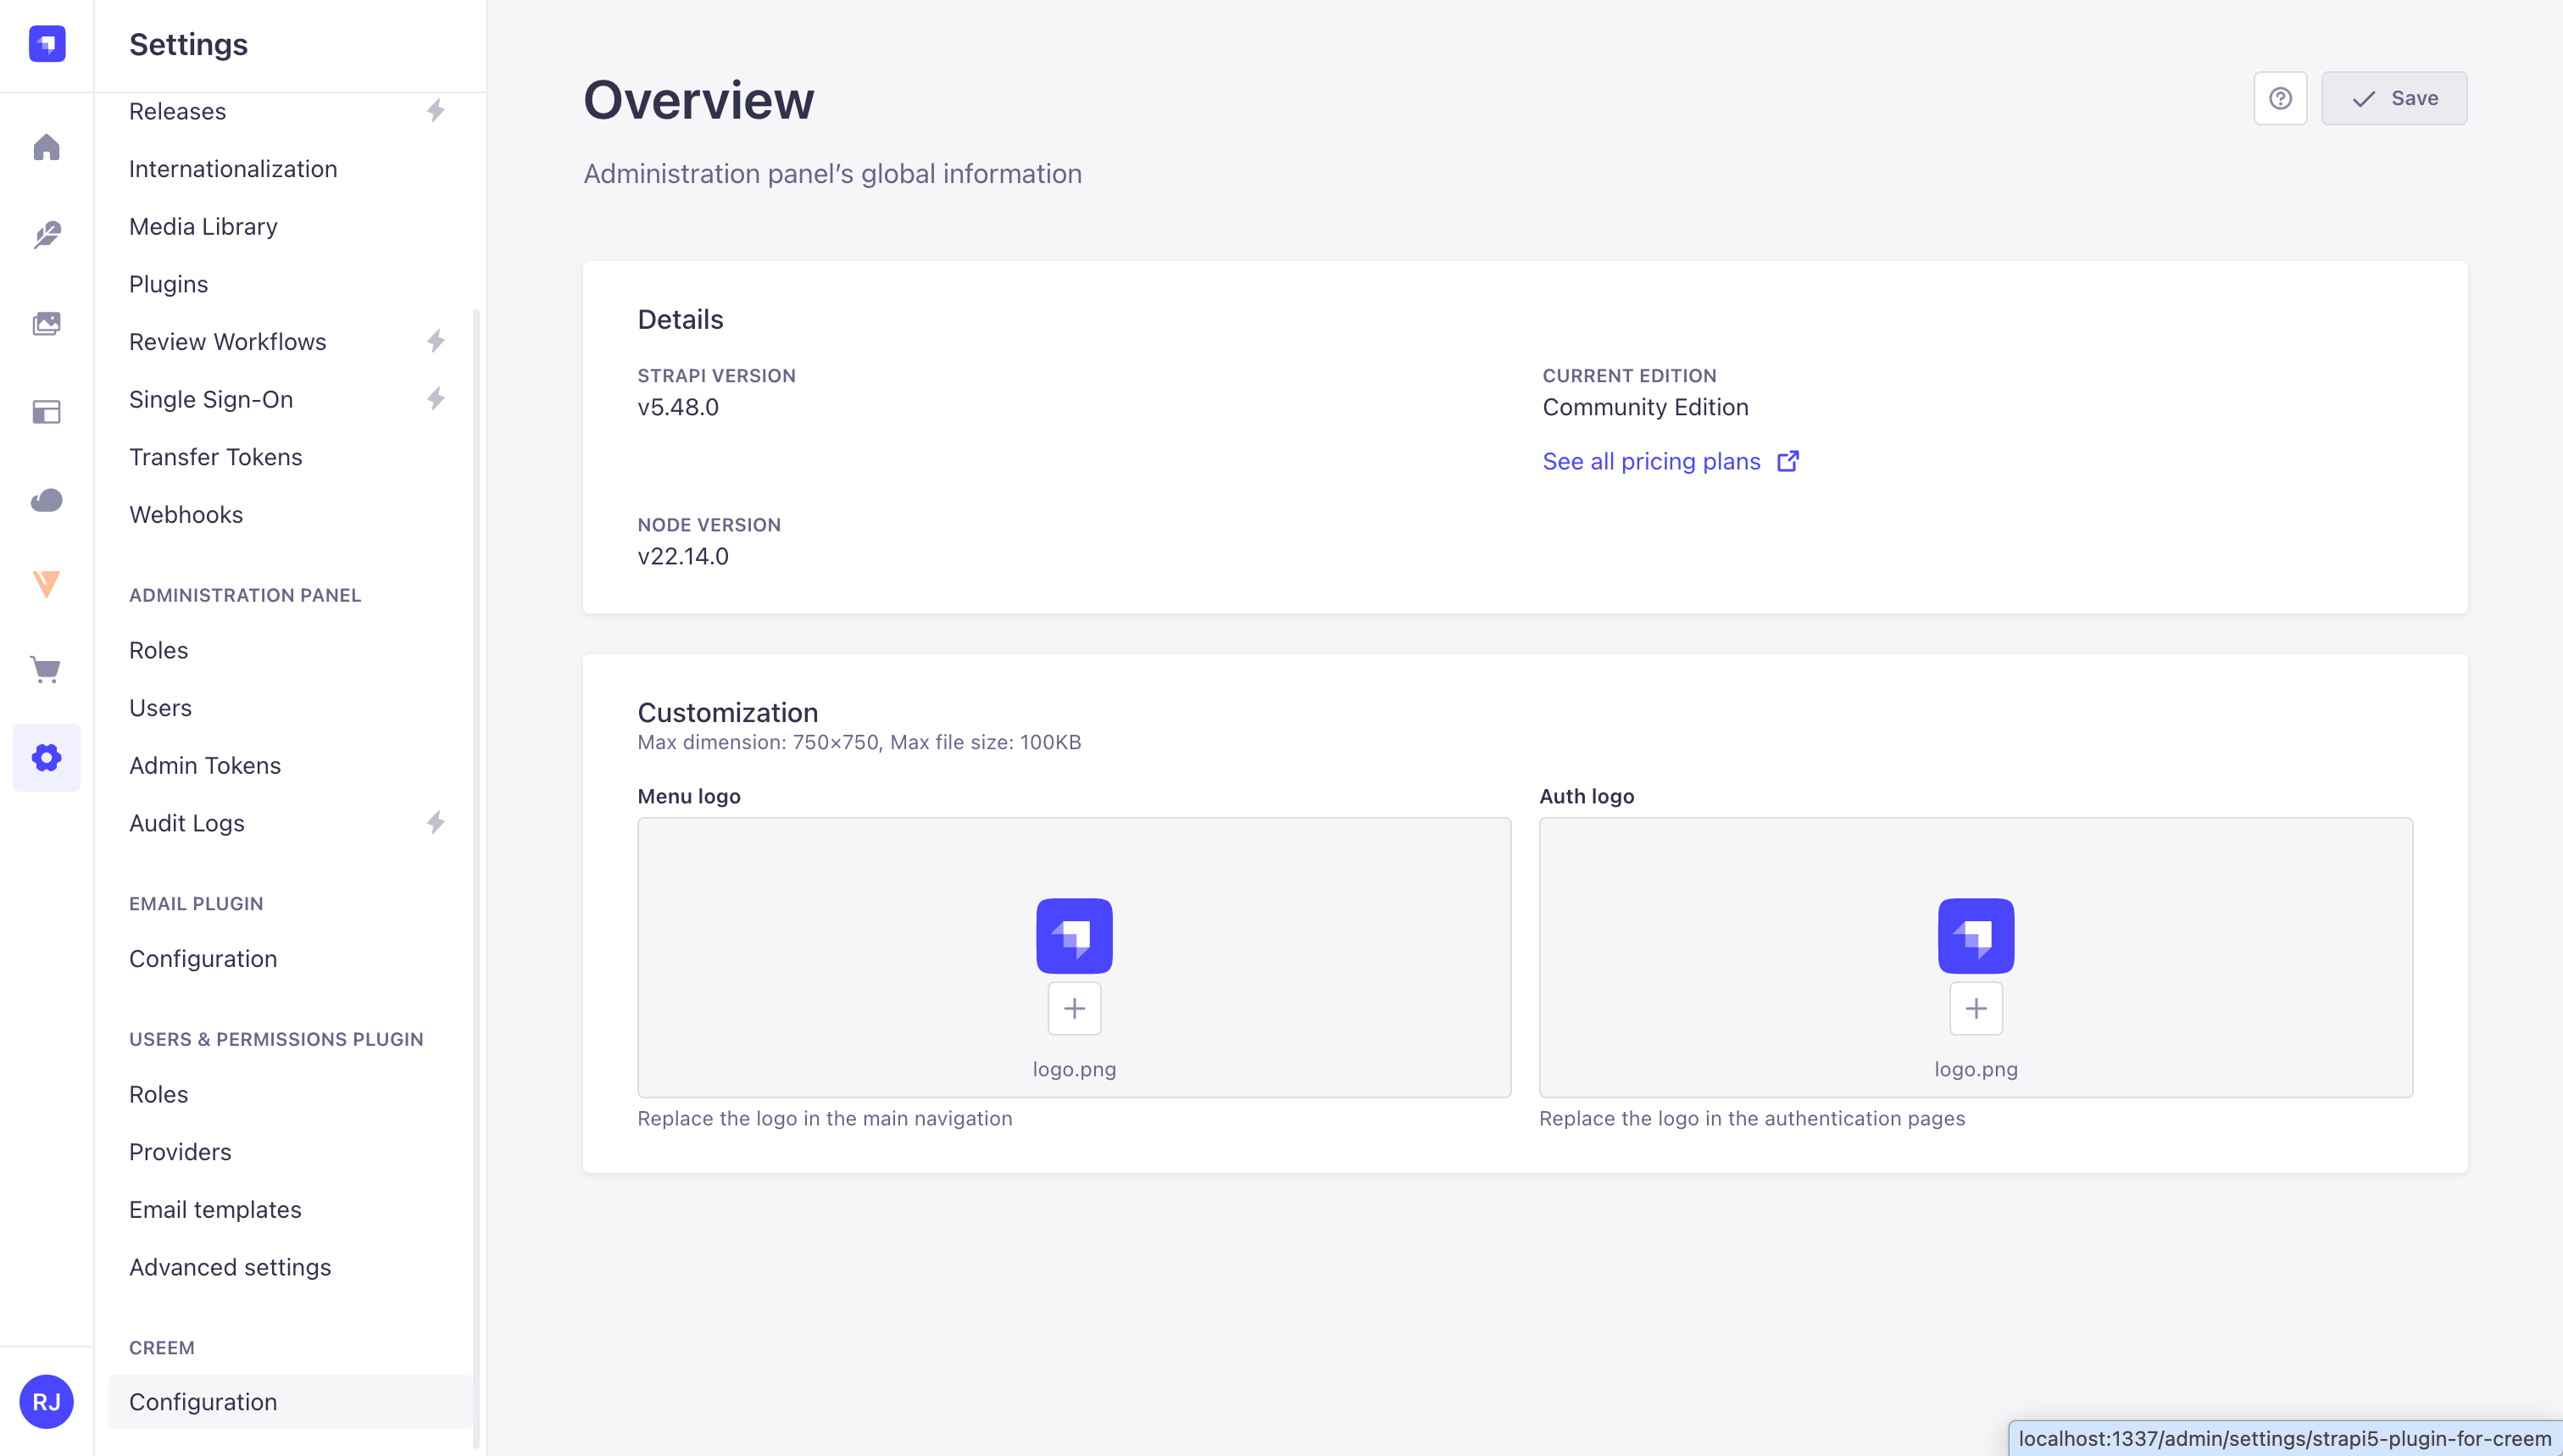 On this page, you'll be able to set the environment, default checkout success URL, and webhook forwarding options.
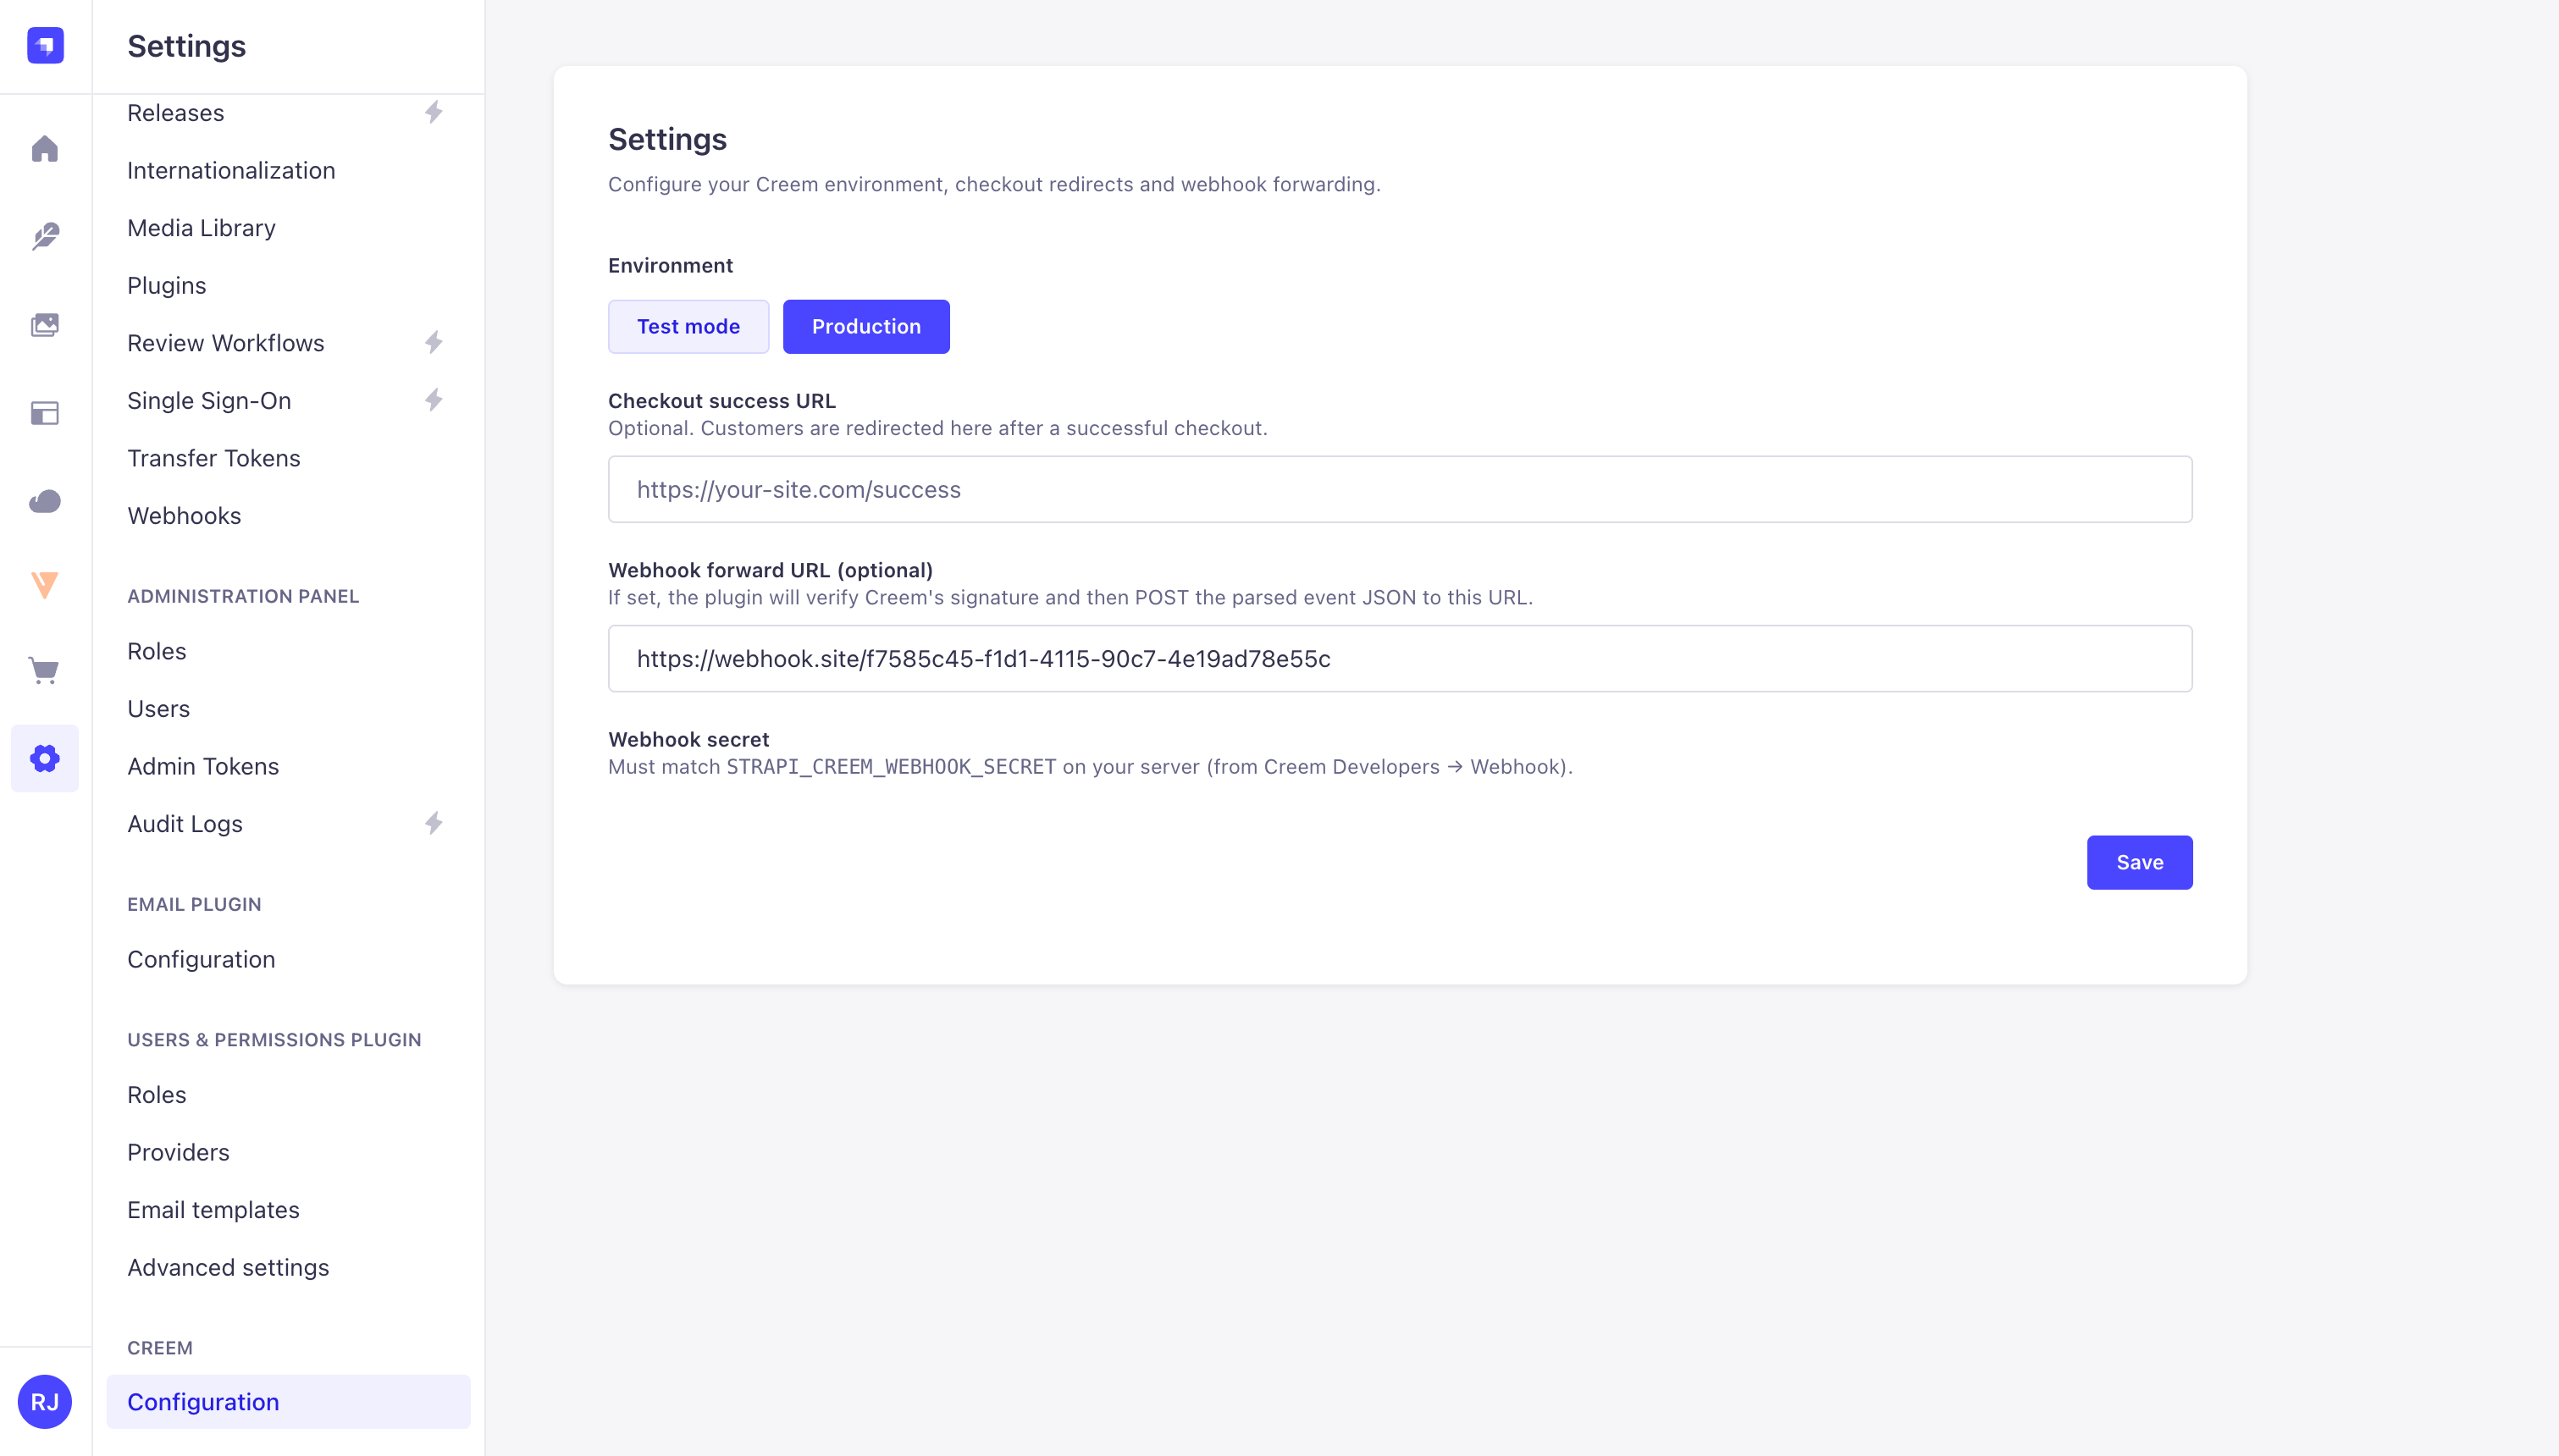 | Setting | Description |
| ------------------------ | -------------------------------------------------------------------------------------------------------------------------------------------------------------------------- |
| **Environment** | Choose **Test mode** or **Production**. Only environments with a matching `.env` key are selectable. |
| **Checkout success URL** | Default redirect after checkout. Per-request `success_url` is used when this is empty. Must be HTTPS in production. |
| **Webhook forward URL** | After HMAC-SHA256 verification, the plugin POSTs the parsed event JSON to this URL. Useful for provisioning access, updating user records, or triggering email automation. |
## Register the webhook in Creem
1. In the [Creem dashboard](https://creem.io/dashboard), go to **Developers → Webhook**.
2. Add your public HTTPS endpoint:
**Production / staging:**
```
https://your-deployed-strapi-instance.com/api/@creem_io/strapi/webhook
```
**Local development** (Creem cannot reach `localhost` directly, so expose your local Strapi with a tunnel first):
```bash theme={null}
ngrok http 1337
```
Then use the tunnel URL:
```
https://abcd.ngrok.io/api/@creem_io/strapi/webhook
```
3. Copy the signing secret and set `STRAPI_CREEM_WEBHOOK_SECRET` in your Strapi `.env`.
4. Restart Strapi.
The plugin responds with **HTTP 200** on successful verification. If a **Webhook Forward URL** is configured, the verified payload is forwarded there automatically.
| Setting | Description |
| ------------------------ | -------------------------------------------------------------------------------------------------------------------------------------------------------------------------- |
| **Environment** | Choose **Test mode** or **Production**. Only environments with a matching `.env` key are selectable. |
| **Checkout success URL** | Default redirect after checkout. Per-request `success_url` is used when this is empty. Must be HTTPS in production. |
| **Webhook forward URL** | After HMAC-SHA256 verification, the plugin POSTs the parsed event JSON to this URL. Useful for provisioning access, updating user records, or triggering email automation. |
## Register the webhook in Creem
1. In the [Creem dashboard](https://creem.io/dashboard), go to **Developers → Webhook**.
2. Add your public HTTPS endpoint:
**Production / staging:**
```
https://your-deployed-strapi-instance.com/api/@creem_io/strapi/webhook
```
**Local development** (Creem cannot reach `localhost` directly, so expose your local Strapi with a tunnel first):
```bash theme={null}
ngrok http 1337
```
Then use the tunnel URL:
```
https://abcd.ngrok.io/api/@creem_io/strapi/webhook
```
3. Copy the signing secret and set `STRAPI_CREEM_WEBHOOK_SECRET` in your Strapi `.env`.
4. Restart Strapi.
The plugin responds with **HTTP 200** on successful verification. If a **Webhook Forward URL** is configured, the verified payload is forwarded there automatically.
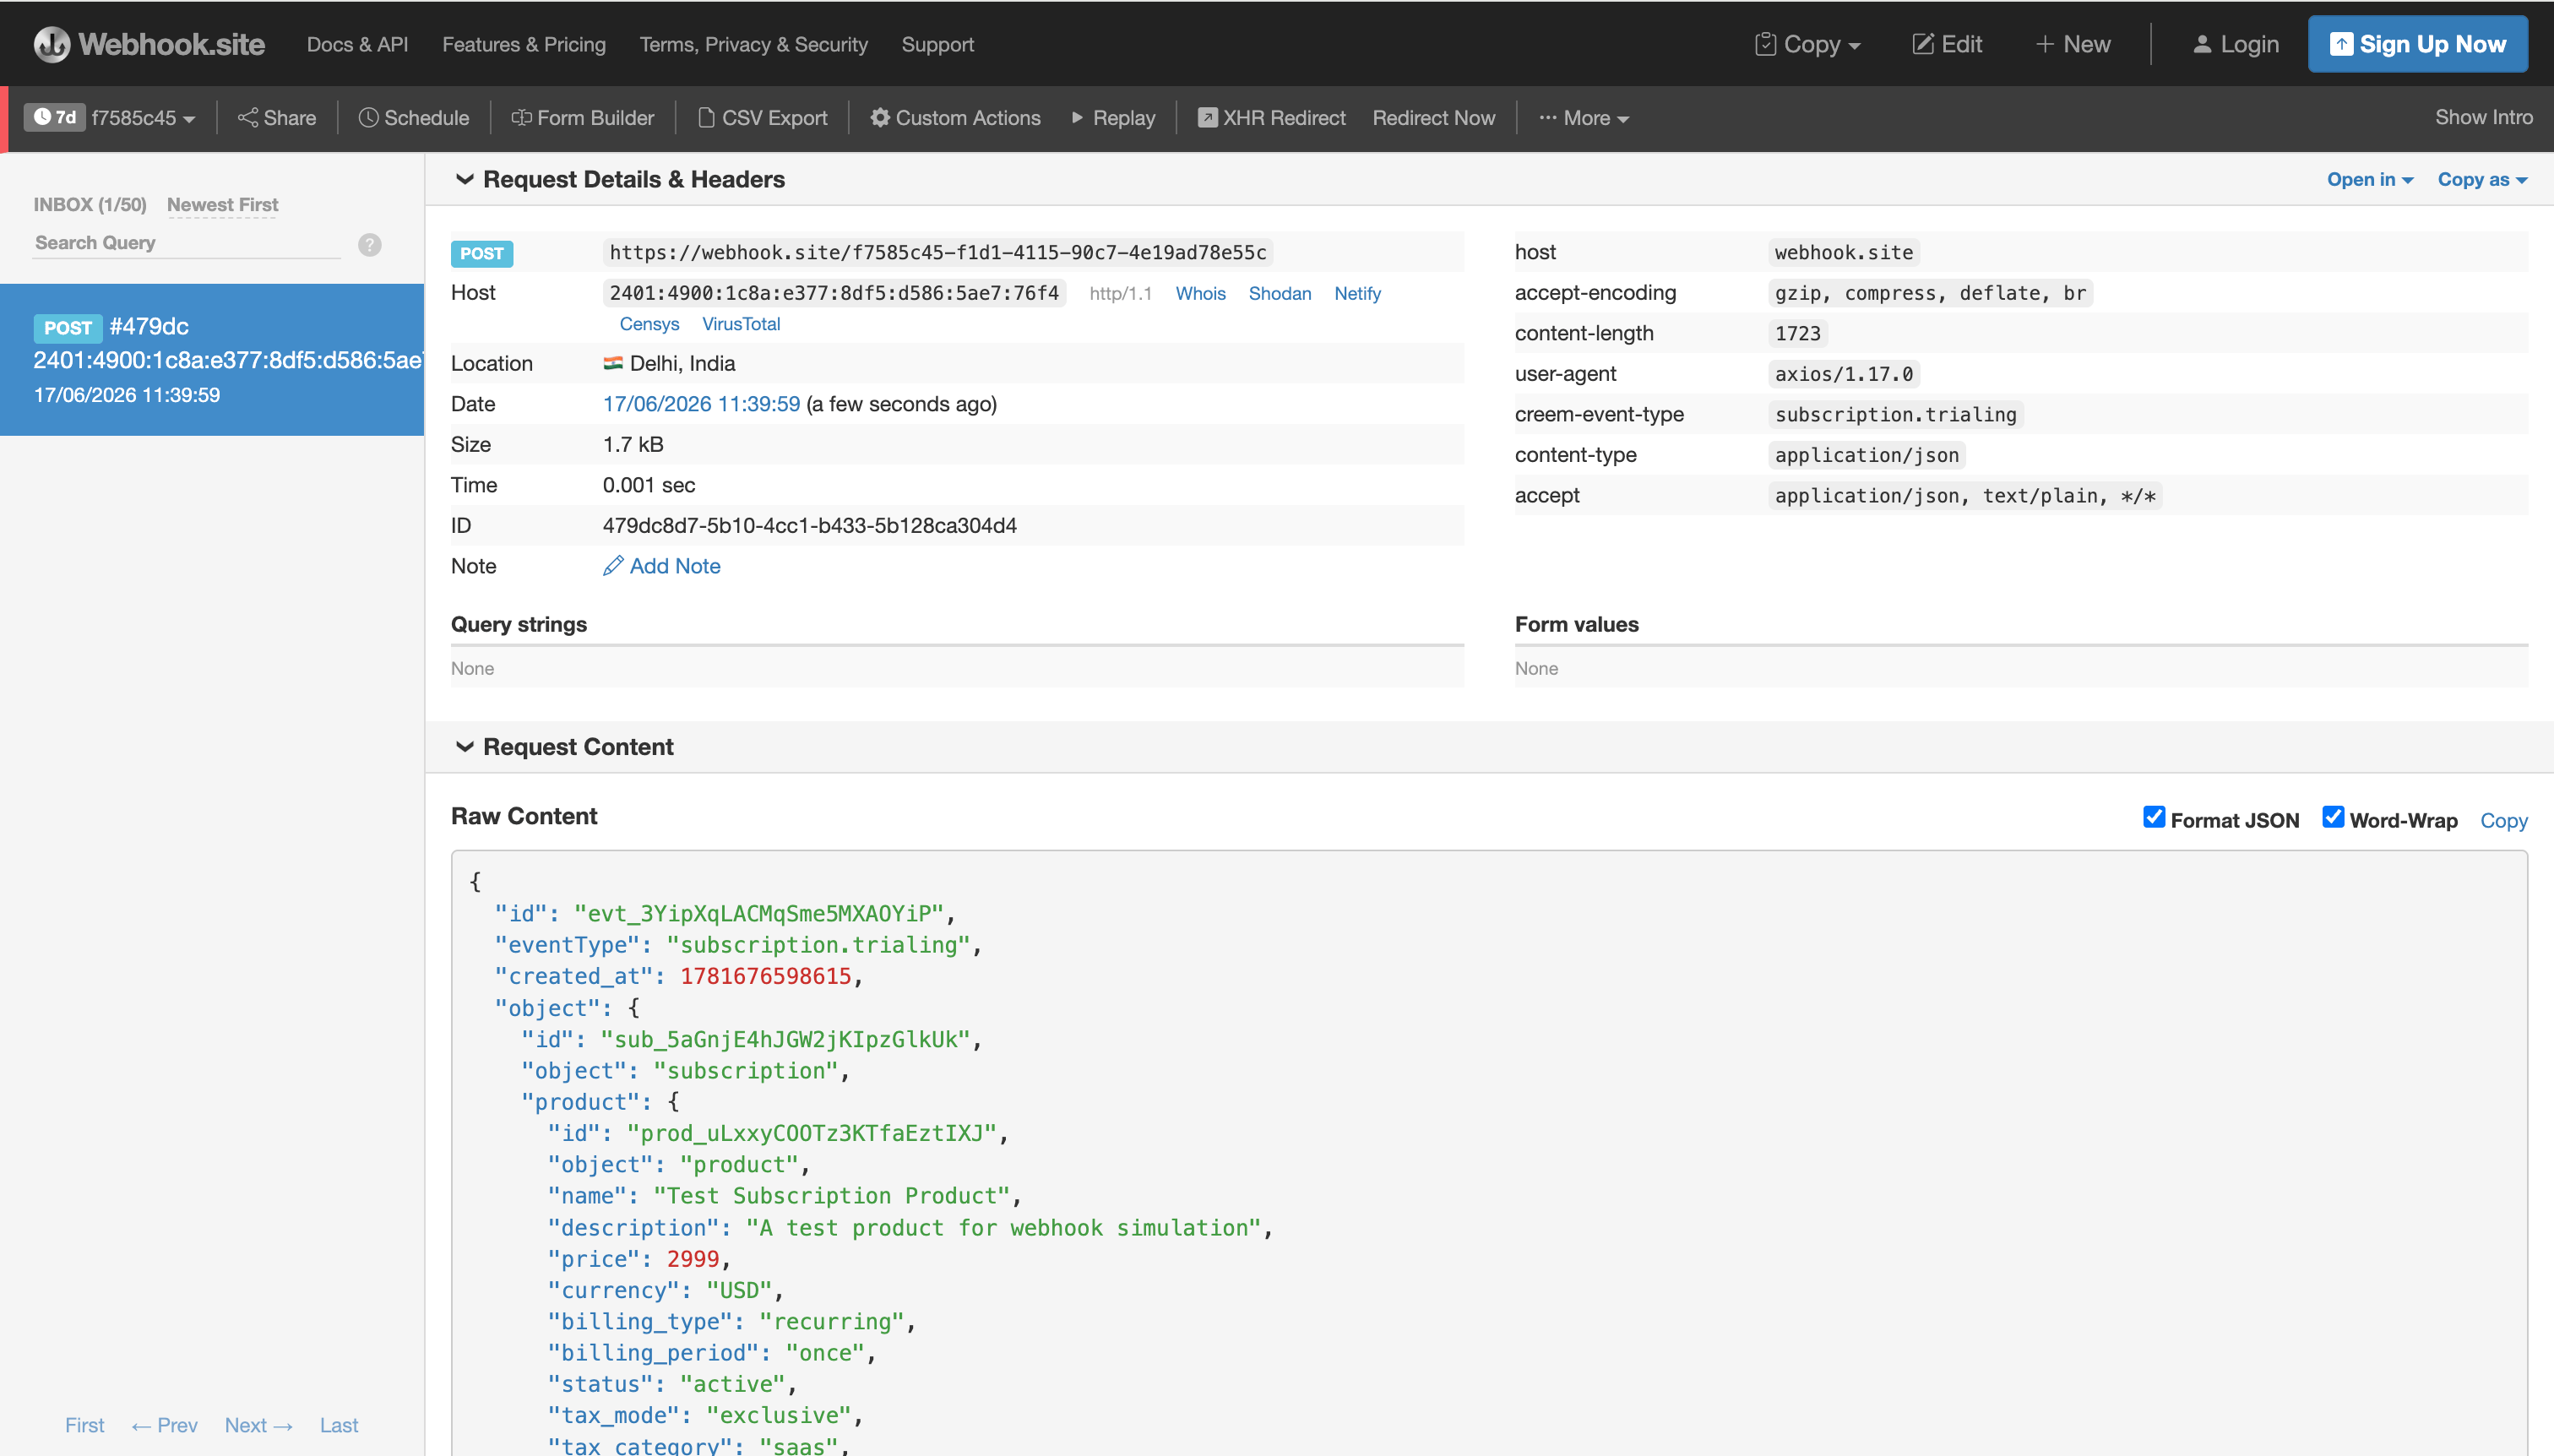 See the [Creem webhooks guide](/code/webhooks) for all supported events (`checkout.completed`, `subscription.active`, `subscription.paid`, `subscription.canceled`, `refund.created`, and more).
## Resources
Install the plugin and view release history.
Signature verification, event types, and payload examples.
Strapi's REST content API reference.
Get your first API key and create a test product.
See the [Creem webhooks guide](/code/webhooks) for all supported events (`checkout.completed`, `subscription.active`, `subscription.paid`, `subscription.canceled`, `refund.created`, and more).
## Resources
Install the plugin and view release history.
Signature verification, event types, and payload examples.
Strapi's REST content API reference.
Get your first API key and create a test product.